
Chicken Cobbler

There is something about a bubbling casserole coming out of the oven that makes the whole house feel a little calmer. On those evenings when backpacks are still by the door, somebody is asking where their shoes went, and dinner somehow became an emergency, I love a meal that brings everybody to the table without a lot of fuss.
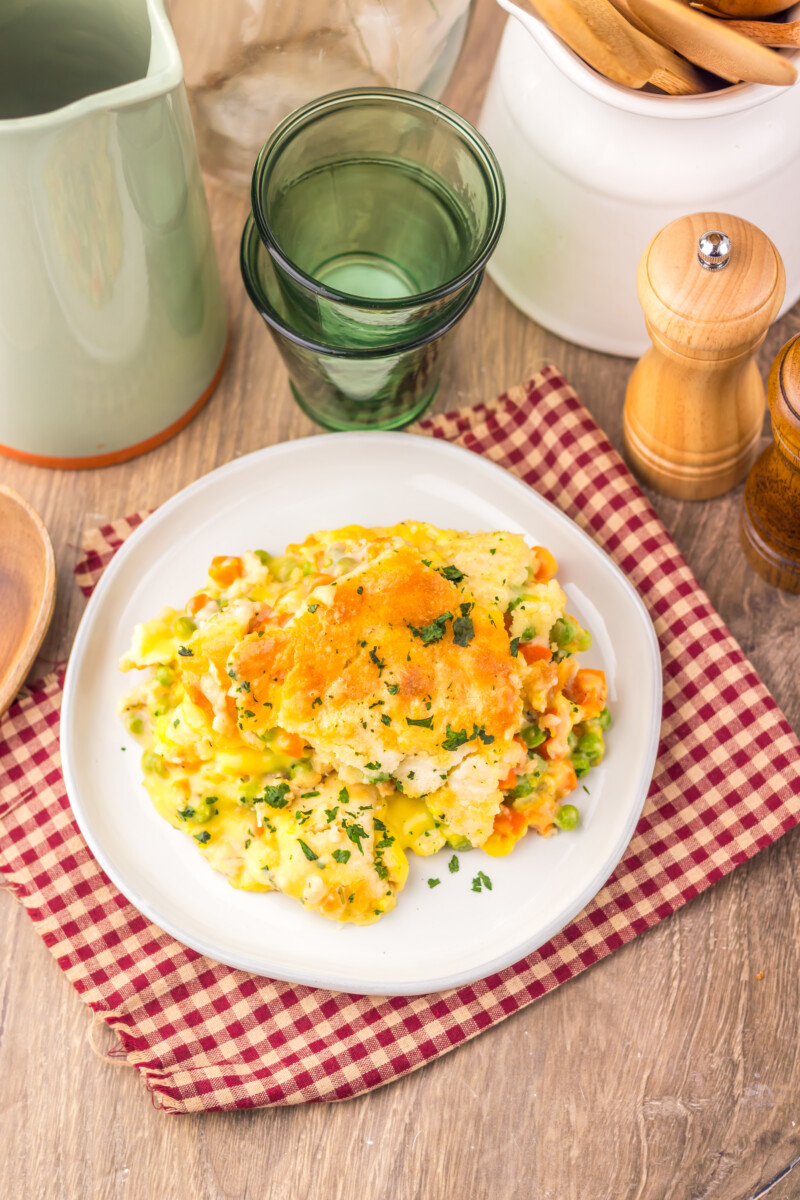
You pull open the oven door and get that warm rush of buttery biscuit, savory chicken, and creamy gravy drifting through the kitchen.
Chicken Cobbler became one of those dependable dinners in our house during a stretch when the days felt especially full and nobody had much patience left by dinnertime. I wanted something hearty and familiar, but I did not want another meal that required three pans and constant attention.
✉ Never miss a recipe — grab Chicken Recipes Cookbook free
Drop your email and we’ll take care of the rest
Get It NowThis Chicken Cobbler gave me exactly that kind of comfort with ingredients I could grab quickly and layer straight into one baking dish.
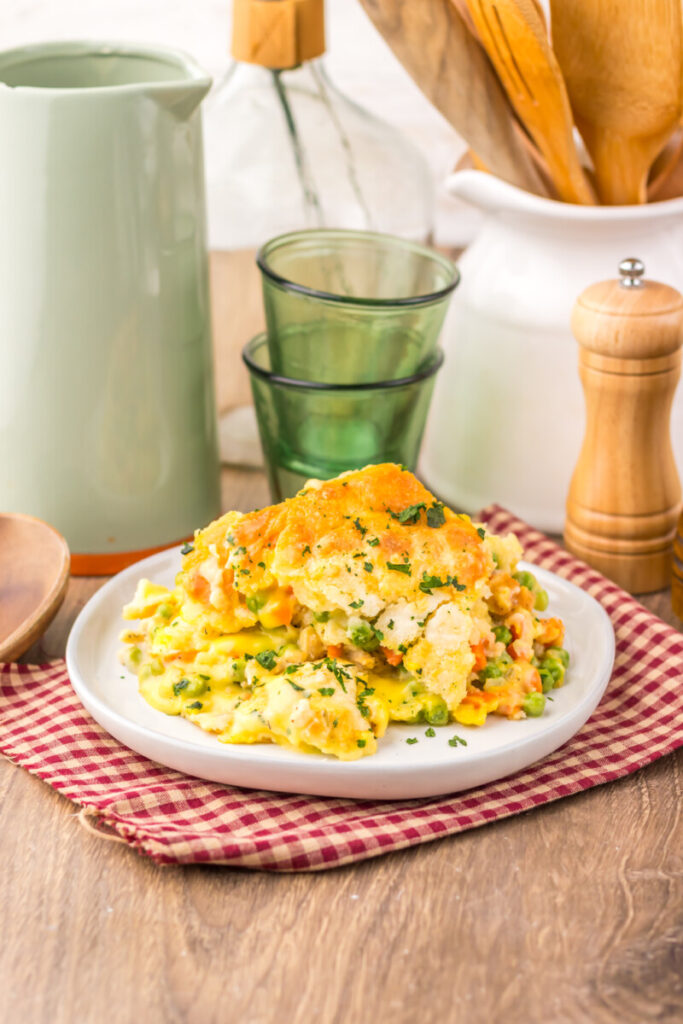
This recipe takes everything you love about creamy chicken and biscuits and turns it into one cozy casserole. The chicken stays tender, the peas and carrots soften into the rich gravy, and the biscuit topping bakes up fluffy underneath with a lightly crisp, golden top.
Every spoonful has that creamy filling wrapped around soft biscuit and savory chicken. It tastes like Sunday dinner but works beautifully on a random Tuesday night.
The part I appreciate most is how little babysitting it needs. You layer everything into the dish, pour the biscuit mixture over the top, and let the oven handle the hard part while you deal with homework, dishes, or whatever else the evening has waiting for you.
It comes out tasting like you tried a whole lot harder than you did, and I have a feeling it will earn a permanent spot in your dinner rotation.
What Is Chicken Cobbler?
Chicken Cobbler is a creamy chicken casserole topped with a simple biscuit batter that rises and turns golden while the filling cooks underneath. Think of it as a close cousin to chicken pot pie, only you skip the pie crust and most of the prep work.
Instead of making a separate sauce on the stove, you layer shredded rotisserie chicken, vegetables, cream of chicken soup, and chicken stock right in the baking dish. A smooth mixture of Bisquick and milk goes over everything, and then the whole casserole bakes until the edges are bubbling and the topping is set.
What makes this dinner especially nice for a busy family is the contrast in every serving. You get tender chicken, sweet peas and carrots, creamy gravy, and that soft biscuit layer that soaks up some of the savory filling underneath.
The top gets just enough color and texture to give you that baked biscuit feel.
It is filling without needing much on the side, which is exactly what I want from a weeknight casserole.
Why You’ll Love This Recipe
- It uses simple ingredients: Rotisserie chicken, frozen vegetables, canned soup, baking mix, and milk keep the shopping list short and familiar.
- Prep is genuinely manageable: Most of the work is simply layering ingredients into the baking dish, which is a big win when everyone is already hungry.
- It feeds the whole table: One pan gives you about 4 to 6 generous servings, making it a practical family dinner.
- The texture is pure comfort food: Creamy chicken filling sits underneath a fluffy biscuit topping with a soft bottom and lightly golden surface.
- Cleanup stays reasonable: You need the baking dish, one mixing bowl, and a whisk, which means the kitchen does not look like you cooked for a holiday afterward.
- It is flexible: Leftover chicken, different vegetables, another cream soup, cheese, herbs, or bacon can all give the basic recipe a slightly different personality.
When to Serve This Recipe
- Busy weeknights: This is one of my favorite kinds of dinners for evenings when the schedule is full and you need something substantial without standing at the stove.
- Sunday family dinner: Add a salad and something a little sweet afterward and you have a cozy meal that feels right at home on a Sunday table.
- Cold weather evenings: The creamy filling and warm biscuit topping are especially welcome when everyone comes through the door wanting something hot.
- Casual company: Chicken Cobbler is relaxed enough for family dinner but comforting enough to serve when grandparents, neighbors, or friends stop by.
- Leftover chicken nights: If you have cooked chicken waiting in the refrigerator, this casserole gives it an easy second life.
Ingredients
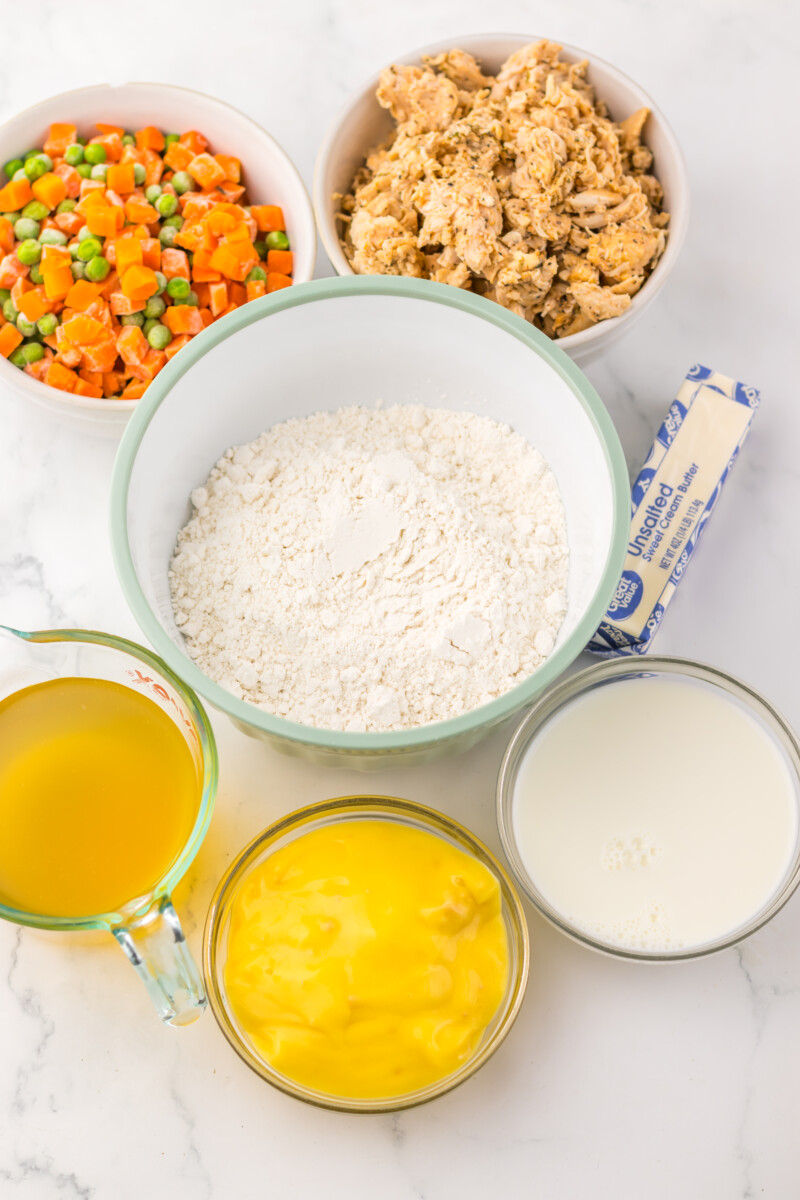
- ½ cup unsalted butter: Melting the butter directly in the baking dish coats the bottom and gives the casserole a rich base without adding extra prep.
- 3 cups shredded rotisserie chicken: Rotisserie chicken saves a huge amount of time and already brings plenty of savory flavor to the filling.
- 1 12 ounce bag frozen peas and carrots: There is no need to thaw them first, which keeps this recipe especially convenient.
- 1 10.5 ounce can cream of chicken soup: This gives the filling its creamy body and helps create that familiar chicken gravy texture.
- 2 cups chicken stock: Stock loosens the soup and provides enough moisture for a rich, spoonable filling as the casserole bakes.
- 2 cups Bisquick baking mix: This creates the soft biscuit style topping without making dough from scratch.
- 2 cups whole milk: Whole milk gives the topping a tender, creamy texture and mixes smoothly with the Bisquick.
How to Make Chicken Cobbler
Step 1: Preheat the Oven and Melt the Butter
Preheat your oven to 350°F. Put the ½ cup of unsalted butter into a 9 by 13 inch baking dish, then place the dish in the oven just long enough for the butter to melt.
Keep an eye on it because you are not trying to brown the butter. You simply want it fully melted and ready to coat the bottom of the dish.
Carefully remove the hot pan from the oven and gently tilt or swirl it so the butter covers the bottom as evenly as possible.
Step 2: Layer in the Chicken
Scatter the 3 cups of shredded rotisserie chicken evenly over the melted butter. Try to spread it all the way to the corners so every serving gets a good amount of chicken.
You do not need to press it down or mix it with the butter. In fact, one of the biggest things to remember with Chicken Cobbler is that the layers are supposed to stay separate while you assemble it.
The oven will bring everything together as it bakes.
Step 3: Add the Peas and Carrots
Sprinkle the frozen peas and carrots evenly over the chicken. They can go straight into the casserole from the freezer, so there is no need to thaw, drain, or cook them first.

I like to make sure the vegetables are spread around rather than sitting in one big pile because that gives you a little color and sweetness in every scoop. Once they are in the dish, leave the layers alone and move on to the creamy portion.
Step 4: Add the Cream of Chicken Soup and Stock
Dollop the cream of chicken soup evenly across the vegetables. It does not have to look perfectly smooth because it will loosen as the casserole heats.
Slowly pour the chicken stock over the top, moving around the dish as you pour so the liquid is distributed as evenly as possible. Do not stir.
I know it can feel strange to leave everything sitting in layers, especially when your instinct says casserole ingredients should be mixed together, but that separation is what helps create the creamy filling underneath the biscuit topping.
Step 5: Mix the Biscuit Topping
In a large mixing bowl, whisk together the Bisquick baking mix and whole milk until the mixture is smooth. Make sure you scrape around the bottom and sides of the bowl so you do not leave dry pockets of baking mix behind.
The batter will be pourable, which is exactly what you want. You are not making traditional rolled biscuits here.
This batter spreads over the casserole and bakes into one big tender topping that you can scoop right along with the chicken filling.
Step 6: Pour on the Biscuit Batter
Carefully pour the Bisquick mixture evenly over the casserole. Move slowly from one side of the dish to the other so you cover as much of the surface as you can.
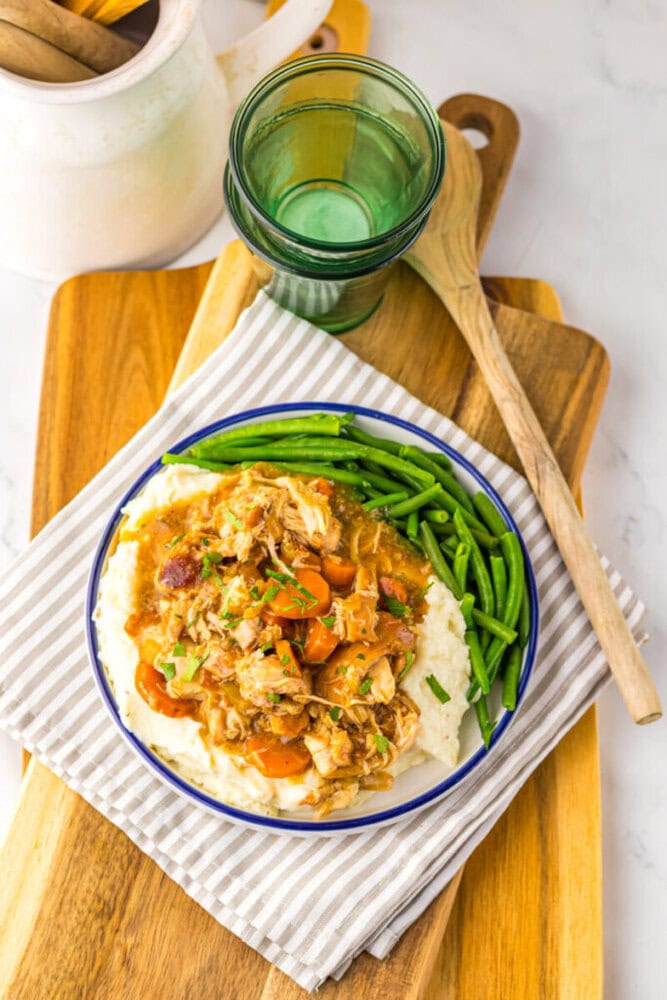
Again, do not stir. The casserole may look a little unusual at this stage because you can still see distinct layers, but that is completely normal.
As it bakes, the liquid underneath thickens and bubbles while the biscuit mixture rises and sets across the top.
Step 7: Bake Until Golden and Bubbling
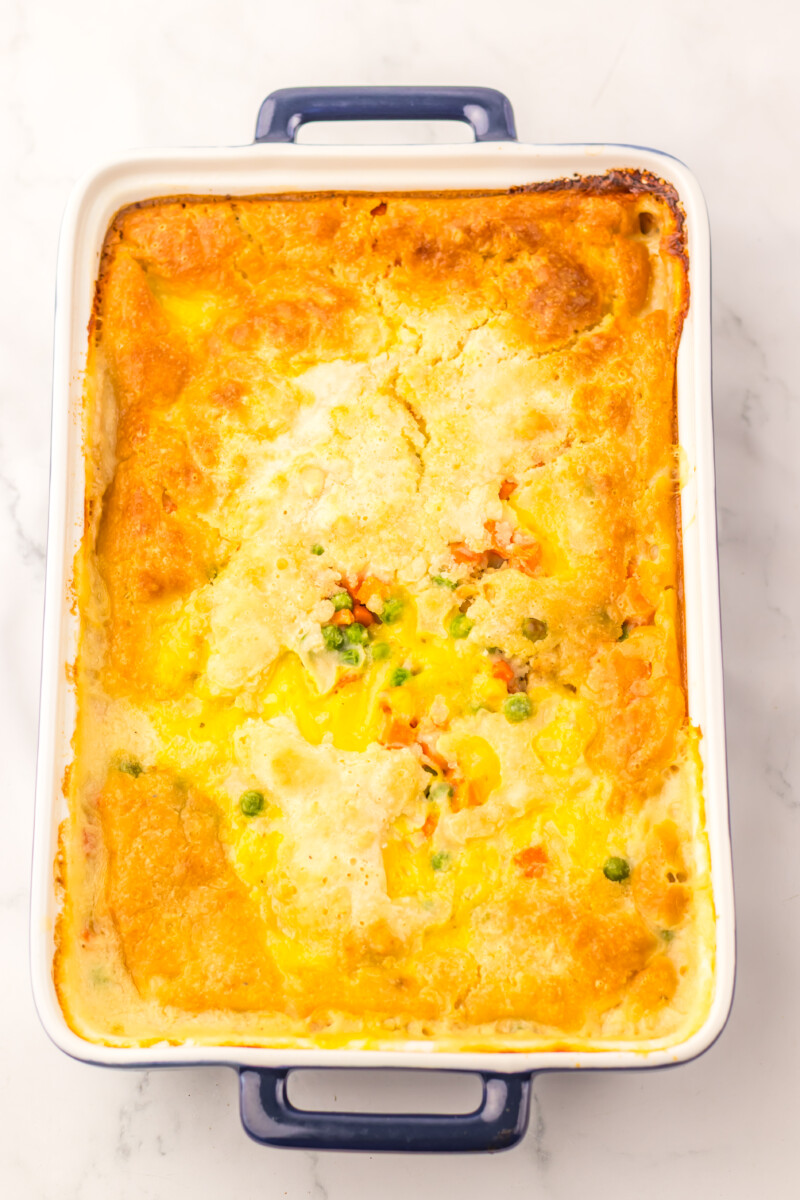
Place the casserole in the oven uncovered and bake for 55 to 60 minutes. You are looking for a golden biscuit topping that appears cooked through rather than wet in the center.
Around the edges, the creamy chicken filling should be hot and bubbling. If the topping starts getting darker than you would like before the middle is done, loosely cover the dish with foil for the final portion of the baking time.
That lets the center keep cooking without pushing the top too far.
Step 8: Rest Before Serving
Take the Chicken Cobbler out of the oven and let it rest for about 10 minutes before serving. This is one of those little steps that is easy to skip when everyone is standing around asking when dinner is ready, but it makes a difference.
The filling is extremely hot right out of the oven, and the resting time gives the creamy gravy a chance to thicken slightly. Once it has settled, scoop generous portions into bowls or onto plates and make sure everyone gets some of that golden topping.

Substitutions
- Leftover cooked chicken: Use about 3 cups of shredded or chopped cooked chicken in place of the rotisserie chicken.
- Frozen mixed vegetables: A standard frozen vegetable blend works nicely if you want corn, green beans, or other vegetables along with the peas and carrots.
- Cream of celery soup: This gives the filling a slightly more herbal and savory flavor while keeping the same creamy consistency.
- Cream of mushroom soup: Use this if your family enjoys the earthy flavor of mushrooms and you want a deeper tasting sauce.
- Chicken broth: Chicken broth can replace the chicken stock in the same amount if that is what you already have in the pantry.
- Reduced fat Bisquick: This can be used in place of the regular baking mix if you prefer it.
- Lower fat milk: You can use a lighter milk if necessary, though whole milk gives the biscuit topping the richest and most tender result.
Variations
- Cheddar Chicken Cobbler: Stir 1 cup of shredded sharp cheddar cheese into the Bisquick and milk mixture before pouring it over the casserole for a cheesy biscuit topping.
- Herb Chicken Cobbler: Add 1 teaspoon poultry seasoning and ½ teaspoon dried thyme to the biscuit batter for a warm, savory herb flavor.
- Bacon Chicken Cobbler: Sprinkle 6 slices of cooked, crumbled bacon over the chicken before adding the vegetables for a smoky, salty addition that goes especially well with the creamy filling.
- Creamy Chicken Cobbler: Stir 4 ounces of softened cream cheese into the chicken stock until mostly smooth before pouring it over the casserole for an extra rich filling.
- Extra Vegetable Chicken Cobbler: Add a handful of frozen corn or green beans along with the peas and carrots when you want to stretch the vegetables a little further.
Tips and Tricks
- Do not stir the layers: This is the most important tip because keeping the ingredients layered helps create the signature creamy filling and biscuit topping.
- Use a good rotisserie chicken: Since the chicken is one of the main ingredients, starting with tender, well seasoned meat gives the finished casserole better flavor with almost no extra effort.
- Spread everything evenly: You do not need perfection, but even layers help each serving get chicken, vegetables, gravy, and biscuit topping.
- Watch the topping near the end: If the biscuit layer is browning too quickly, loosely cover the dish with foil during the final 10 to 15 minutes.
- Give it time to rest: Waiting about 10 minutes after baking allows the filling to settle and makes the casserole much easier to serve.
- Put the baking dish on a sheet pan if needed: If your casserole dish is filled close to the top, setting it on a rimmed baking sheet can give you a little extra insurance against drips in the oven.

FAQs
Can I use leftover chicken instead of rotisserie chicken?
Absolutely. I make casseroles like this partly because they are such an easy way to use what is already in the refrigerator.
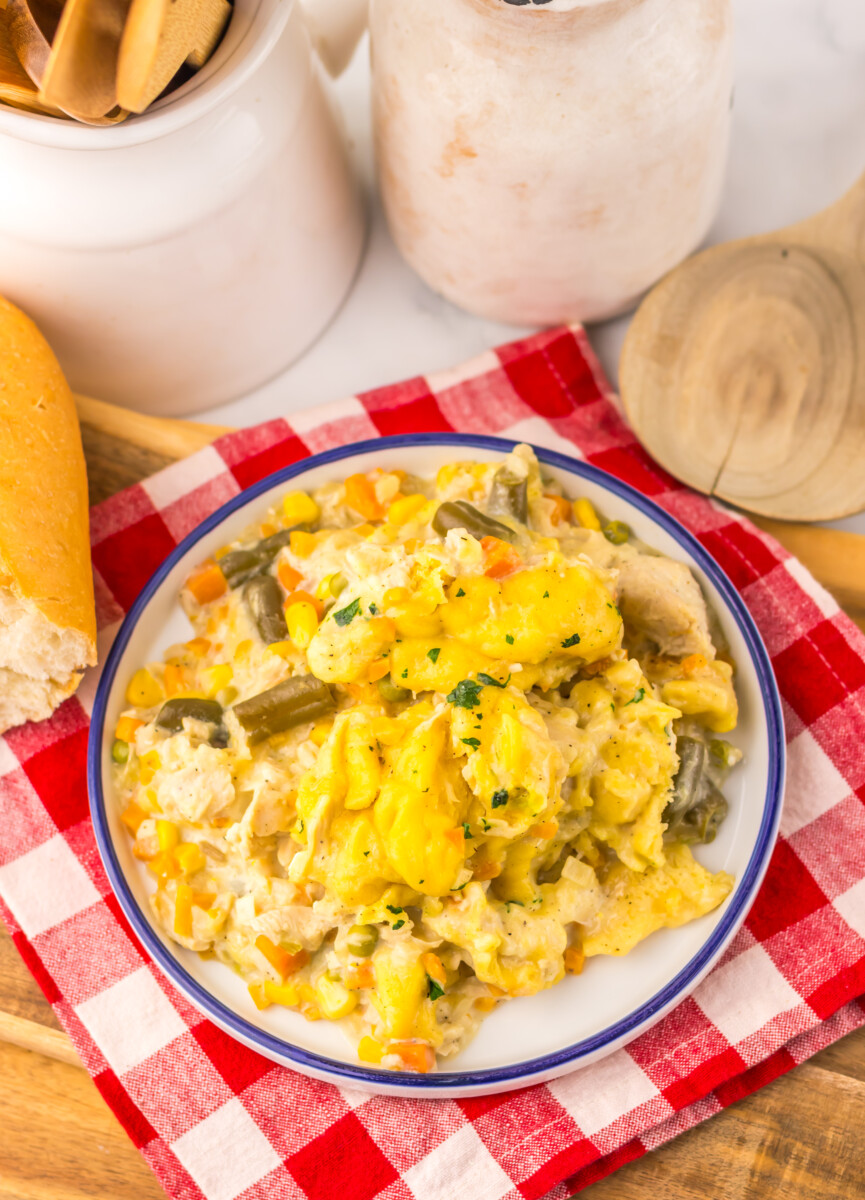
You need about 3 cups of cooked shredded or chopped chicken. White meat, dark meat, or a combination will all work.
Just make sure the chicken is already fully cooked before it goes into the baking dish.
Do I need to thaw the frozen vegetables first?
No. Add the peas and carrots straight from the freezer.
That is one of the conveniences of this recipe. Thawing them first can also add unnecessary moisture if they are not drained well, so going directly from freezer to baking dish keeps the process simple.
Why should I not stir Chicken Cobbler?
The separate layers are what give Chicken Cobbler its distinctive texture. The stock and soup create the creamy filling while the Bisquick batter cooks across the top.
Stirring everything together before baking can change the way the biscuit mixture sets and leave you with a much less defined topping.
How do I know when the Chicken Cobbler is done?
The top should be golden and look cooked through in the center, and the filling should be visibly bubbling around the edges of the baking dish. The full bake usually takes about 55 to 60 minutes at 350°F.
If the center of the topping still looks wet, give it a few more minutes while keeping an eye on the color.
Can I make Chicken Cobbler ahead of time?
For the best biscuit texture, I prefer to assemble and bake it close to serving time. You can make your prep faster by shredding the chicken ahead of time and measuring the ingredients.
If you do assemble it in advance, keep it refrigerated and understand that the biscuit layer may absorb more liquid while it sits.
Can I freeze Chicken Cobbler?
Yes. Let the baked casserole cool, then wrap it tightly or transfer portions to freezer safe containers.
Freeze it for up to 2 months. Thaw it overnight in the refrigerator before reheating.
The topping may be a little softer after freezing, but the flavor will still be comforting and satisfying.
Serving Ideas
- Simple green salad: A crisp salad with a light dressing balances the creamy casserole and keeps dinner from feeling too heavy.
- Cranberry sauce: A spoonful on the side adds a sweet, tart contrast that reminds me a little of a holiday dinner without requiring holiday effort.
- Roasted green beans: Their slightly crisp texture is a nice match for the soft, creamy Chicken Cobbler.
- Steamed broccoli: This is an easy way to put another vegetable on the table without adding much work.
- Fresh fruit: Apple slices, grapes, berries, or orange wedges make a simple family friendly side when you want dinner to stay very low effort.
- Nothing extra at all: This casserole already has chicken, vegetables, gravy, and biscuits in one dish, so there are plenty of nights when I scoop it into bowls and call dinner done.
Storage and Make Ahead Tips
- Refrigerate leftovers promptly: Once the casserole has cooled, cover it well or transfer it to an airtight container and refrigerate it for up to 4 days.
- Reheat individual servings in the microwave: Heat one portion at a time until the center is hot, checking and stirring the creamy filling as needed.
- Reheat larger portions in the oven: Cover the casserole and warm it in a 325°F oven until heated through. This method is especially useful when you are reheating enough for several people.
- Freeze for longer storage: Wrap the cooled casserole tightly or pack portions into freezer safe containers and freeze for up to 2 months.
- Thaw overnight: Move frozen Chicken Cobbler to the refrigerator the night before you plan to serve it, then reheat once it has thawed.
- Expect a softer topping after storage: The biscuit layer continues soaking up some of the creamy filling in the refrigerator, so leftovers are softer than the freshly baked casserole, but they are still delicious.
- Prep the chicken early: If you know tomorrow night will be hectic, shred the rotisserie chicken ahead of time and store it in the refrigerator so assembly takes only a few minutes.

Chicken Cobbler

Ingredients
- ½ cup unsalted butter
- 3 cups shredded rotisserie chicken
- 1 (12-ounce) bag frozen peas and carrots
- 1 (10.5-ounce) can cream of chicken soup
- 2 cups chicken stock
- 2 cups Bisquick baking mix
- 2 cups whole milk
✉ Never miss a recipe — grab Chicken Recipes Cookbook free
Drop your email and we’ll take care of the rest
Get It NowInstructions
- Step 1: Preheat the Oven and Melt the Butter – Preheat your oven to 350°F. Put the ½ cup of unsalted butter into a 9 by 13 inch baking dish, then place the dish in the oven just long enough for the butter to melt. Keep an eye on it because you are not trying to brown the butter. You simply want it fully melted and ready to coat the bottom of the dish. Carefully remove the hot pan from the oven and gently tilt or swirl it so the butter covers the bottom as evenly as possible.
- Step 2: Layer in the Chicken – Scatter the 3 cups of shredded rotisserie chicken evenly over the melted butter. Try to spread it all the way to the corners so every serving gets a good amount of chicken. You do not need to press it down or mix it with the butter. In fact, one of the biggest things to remember with Chicken Cobbler is that the layers are supposed to stay separate while you assemble it. The oven will bring everything together as it bakes.
- Step 3: Add the Peas and Carrots – Sprinkle the frozen peas and carrots evenly over the chicken. They can go straight into the casserole from the freezer, so there is no need to thaw, drain, or cook them first. I like to make sure the vegetables are spread around rather than sitting in one big pile because that gives you a little color and sweetness in every scoop. Once they are in the dish, leave the layers alone and move on to the creamy portion.
- Step 4: Add the Cream of Chicken Soup and Stock – Dollop the cream of chicken soup evenly across the vegetables. It does not have to look perfectly smooth because it will loosen as the casserole heats. Slowly pour the chicken stock over the top, moving around the dish as you pour so the liquid is distributed as evenly as possible. Do not stir. I know it can feel strange to leave everything sitting in layers, especially when your instinct says casserole ingredients should be mixed together, but that separation is what helps create the creamy filling underneath the biscuit topping.
- Step 5: Mix the Biscuit Topping – In a large mixing bowl, whisk together the Bisquick baking mix and whole milk until the mixture is smooth. Make sure you scrape around the bottom and sides of the bowl so you do not leave dry pockets of baking mix behind. The batter will be pourable, which is exactly what you want. You are not making traditional rolled biscuits here. This batter spreads over the casserole and bakes into one big tender topping that you can scoop right along with the chicken filling.
- Step 6: Pour on the Biscuit Batter – Carefully pour the Bisquick mixture evenly over the casserole. Move slowly from one side of the dish to the other so you cover as much of the surface as you can. Again, do not stir. The casserole may look a little unusual at this stage because you can still see distinct layers, but that is completely normal. As it bakes, the liquid underneath thickens and bubbles while the biscuit mixture rises and sets across the top.
- Step 7: Bake Until Golden and Bubbling – Place the casserole in the oven uncovered and bake for 55 to 60 minutes. You are looking for a golden biscuit topping that appears cooked through rather than wet in the center. Around the edges, the creamy chicken filling should be hot and bubbling. If the topping starts getting darker than you would like before the middle is done, loosely cover the dish with foil for the final portion of the baking time. That lets the center keep cooking without pushing the top too far.
- Step 8: Rest Before Serving – Take the Chicken Cobbler out of the oven and let it rest for about 10 minutes before serving. This is one of those little steps that is easy to skip when everyone is standing around asking when dinner is ready, but it makes a difference. The filling is extremely hot right out of the oven, and the resting time gives the creamy gravy a chance to thicken slightly. Once it has settled, scoop generous portions into bowls or onto plates and make sure everyone gets some of that golden topping.
Notes
Substitutions
- Leftover cooked chicken: Use about 3 cups of shredded or chopped cooked chicken in place of the rotisserie chicken.
- Frozen mixed vegetables: A standard frozen vegetable blend works nicely if you want corn, green beans, or other vegetables along with the peas and carrots.
- Cream of celery soup: This gives the filling a slightly more herbal and savory flavor while keeping the same creamy consistency.
- Cream of mushroom soup: Use this if your family enjoys the earthy flavor of mushrooms and you want a deeper tasting sauce.
- Chicken broth: Chicken broth can replace the chicken stock in the same amount if that is what you already have in the pantry.
- Reduced fat Bisquick: This can be used in place of the regular baking mix if you prefer it.
- Lower fat milk: You can use a lighter milk if necessary, though whole milk gives the biscuit topping the richest and most tender result.
Variations
- Cheddar Chicken Cobbler: Stir 1 cup of shredded sharp cheddar cheese into the Bisquick and milk mixture before pouring it over the casserole for a cheesy biscuit topping.
- Herb Chicken Cobbler: Add 1 teaspoon poultry seasoning and ½ teaspoon dried thyme to the biscuit batter for a warm, savory herb flavor.
- Bacon Chicken Cobbler: Sprinkle 6 slices of cooked, crumbled bacon over the chicken before adding the vegetables for a smoky, salty addition that goes especially well with the creamy filling.
- Creamy Chicken Cobbler: Stir 4 ounces of softened cream cheese into the chicken stock until mostly smooth before pouring it over the casserole for an extra rich filling.
- Extra Vegetable Chicken Cobbler: Add a handful of frozen corn or green beans along with the peas and carrots when you want to stretch the vegetables a little further.
Tips and Tricks
- Do not stir the layers: This is the most important tip because keeping the ingredients layered helps create the signature creamy filling and biscuit topping.
- Use a good rotisserie chicken: Since the chicken is one of the main ingredients, starting with tender, well seasoned meat gives the finished casserole better flavor with almost no extra effort.
- Spread everything evenly: You do not need perfection, but even layers help each serving get chicken, vegetables, gravy, and biscuit topping.
- Watch the topping near the end: If the biscuit layer is browning too quickly, loosely cover the dish with foil during the final 10 to 15 minutes.
- Give it time to rest: Waiting about 10 minutes after baking allows the filling to settle and makes the casserole much easier to serve.
- Put the baking dish on a sheet pan if needed: If your casserole dish is filled close to the top, setting it on a rimmed baking sheet can give you a little extra insurance against drips in the oven.
Serving Ideas
- Simple green salad: A crisp salad with a light dressing balances the creamy casserole and keeps dinner from feeling too heavy.
- Cranberry sauce: A spoonful on the side adds a sweet, tart contrast that reminds me a little of a holiday dinner without requiring holiday effort.
- Roasted green beans: Their slightly crisp texture is a nice match for the soft, creamy Chicken Cobbler.
- Steamed broccoli: This is an easy way to put another vegetable on the table without adding much work.
- Fresh fruit: Apple slices, grapes, berries, or orange wedges make a simple family friendly side when you want dinner to stay very low effort.
- Nothing extra at all: This casserole already has chicken, vegetables, gravy, and biscuits in one dish, so there are plenty of nights when I scoop it into bowls and call dinner done.
Storage and Make Ahead Tips
- Refrigerate leftovers promptly: Once the casserole has cooled, cover it well or transfer it to an airtight container and refrigerate it for up to 4 days.
- Reheat individual servings in the microwave: Heat one portion at a time until the center is hot, checking and stirring the creamy filling as needed.
- Reheat larger portions in the oven: Cover the casserole and warm it in a 325°F oven until heated through. This method is especially useful when you are reheating enough for several people.
- Freeze for longer storage: Wrap the cooled casserole tightly or pack portions into freezer safe containers and freeze for up to 2 months.
- Thaw overnight: Move frozen Chicken Cobbler to the refrigerator the night before you plan to serve it, then reheat once it has thawed.
- Expect a softer topping after storage: The biscuit layer continues soaking up some of the creamy filling in the refrigerator, so leftovers are softer than the freshly baked casserole, but they are still delicious.
- Prep the chicken early: If you know tomorrow night will be hectic, shred the rotisserie chicken ahead of time and store it in the refrigerator so assembly takes only a few minutes.
Private Notes
✉ Never miss a recipe — grab Chicken Recipes Cookbook free
Drop your email and we’ll take care of the rest
Get It NowFinal Thoughts
There are dinners I make because they are practical, and there are dinners I make because everybody actually looks happy when I set them on the table. Chicken Cobbler manages to be both.
That is what keeps recipes like this in my rotation. It does not require a special grocery trip, a pile of chopping, or an hour standing over the stove.
You can walk into the kitchen tired, layer a handful of familiar ingredients into a casserole dish, and end up with something warm and homemade enough to make the evening feel a little better.
I especially love that first scoop. You break through the golden biscuit topping and get down into the creamy chicken and vegetables underneath, and suddenly the whole thing makes sense.
The bottom of the biscuit is soft from the gravy, the top has that lightly baked bite, and the chicken stays tender between the two.
Those are the meals I remember from family life. Not necessarily the complicated ones.
Usually it is the casserole in the middle of the table, everybody reaching for seconds, somebody talking about their day while I am already wondering whether there will be enough left for lunch tomorrow.
If your evenings tend to get busy before dinner even begins, keep this Chicken Cobbler close. It is warm, filling, forgiving, and made for the kind of night when feeding your people well is more than enough.