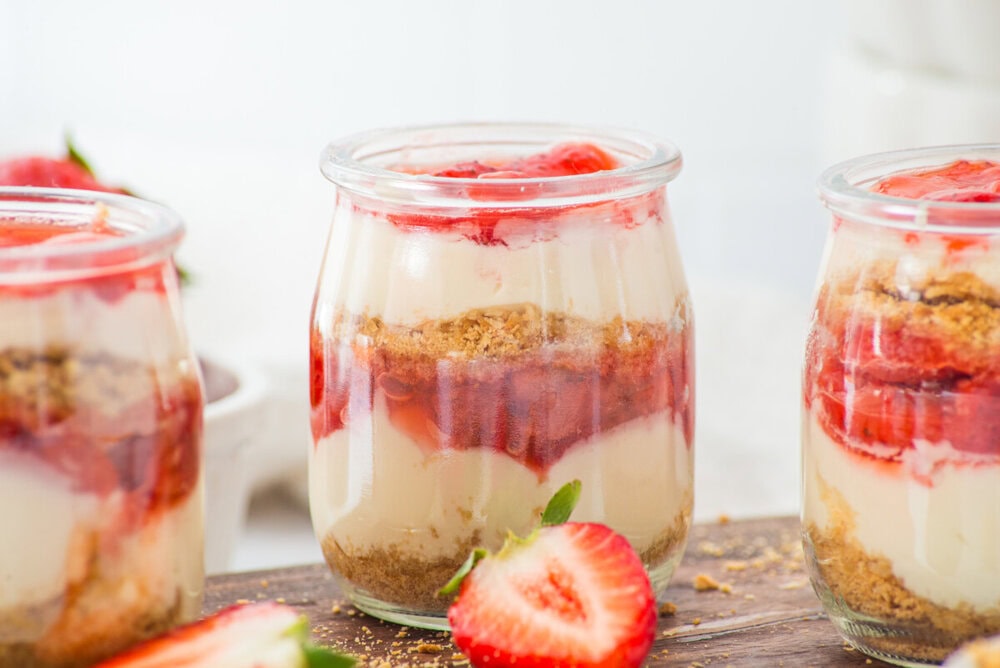
Strawberry Cheesecake Cups
These Strawberry Cheesecake Cups come together in minutes and feel like something you’d get from a café, only they’re made right at home.
No oven, no stress, just layers of creamy filling and sweet strawberries that taste just as good as they look.
They’re perfect for when you want something that feels a little fancy without the work — easy to prep, easy to serve, and perfect for sharing (or not sharing at all).
They’re proof that simple desserts can still feel special!
As you make your way to the recipe, don’t skip the tips section — those small details help everything come out just right.

Preparation time (approximate):
Prepare the crust (blend, mix, and bake): 10–15 minutes
Prepare the strawberry sauce: 10 minutes
Prepare the cream: 5 minutes
Assemble the cups: 10 minutes
Refrigeration: minimum 1 hour
Total active time (excluding refrigeration): 35–40 minutes
Serves: 4 cups
Why You’ll Love This Recipe
This is the kind of dessert that makes everyone happy! It also satisfies all cravings, with a balance of creamy, fruity, sweet, and crunchy.

They’re easy to make ahead for parties, picnics, or weeknight desserts, and they chill beautifully, tasting even better the next day.
Perfect for an after-school snack, a late-night treat, or a little something sweet after a long day.
Ingredients
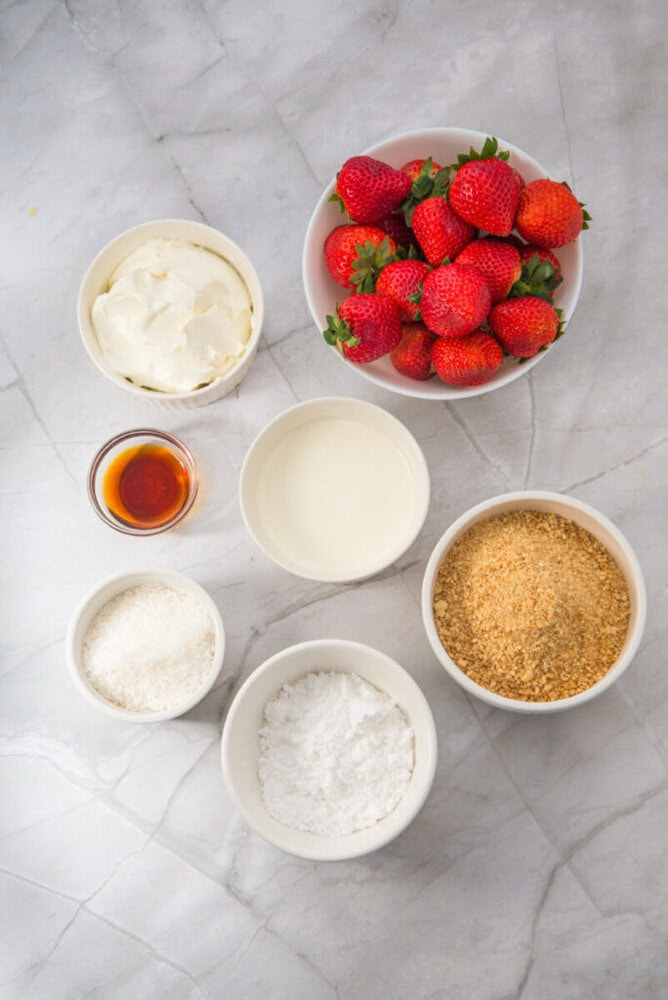
- 1 cup crushed cookies (Graham crackers or vanilla cookies, approx. 15 to 18 cookies) – This forms the base and gives structure and familiar sweetness.
- 1/3 cup shredded coconut – Toasting this adds warmth and depth that makes the base feel special.
- 1 ½ cups strawberries, diced – Fresh strawberries give the sauce brightness and natural sweetness.
- 3 tbsp powdered sugar – Used to sweeten the strawberry sauce gently without overpowering the fruit.
- 1 cup cream cheese – This should be soft for easy mixing and a smooth filling.
- 1/2 cup heavy cream – Cold cream helps create a light and creamy cheesecake texture.
- 1/2 cup powdered sugar – Sweetens the filling while keeping it silky smooth.
- 1 tsp vanilla extract – Adds warmth and rounds out the flavors.
How to Make Strawberry Cheesecake Cups
Step 1: Prepare the base
Preheat your oven to 320 to 340 degrees Fahrenheit. In a bowl, mix the crushed cookies and shredded coconut until evenly combined. Spread the mixture out on a baking sheet in an even layer. Bake for 7 to 10 minutes, stirring once if needed, until the coconut is lightly golden and fragrant. Let it cool completely before using. This step adds flavor and keeps the base from tasting raw.
Step 2: Make the strawberry sauce
Add the diced strawberries and 3 tablespoons of powdered sugar to a saucepan over medium heat. Stir gently as the strawberries release their juices. Use a wooden spoon or spatula to lightly mash them as they soften. Cook until the mixture thickens into a spoonable sauce. Remove from heat and let it cool fully so it does not melt the cream layer.
Step 3: Prepare the cream filling
In a mixing bowl, beat the cold heavy cream with the powdered sugar and vanilla extract for about one minute until slightly thickened. Add the cream cheese and continue beating until smooth and fully combined. The filling should be creamy and soft, not stiff.
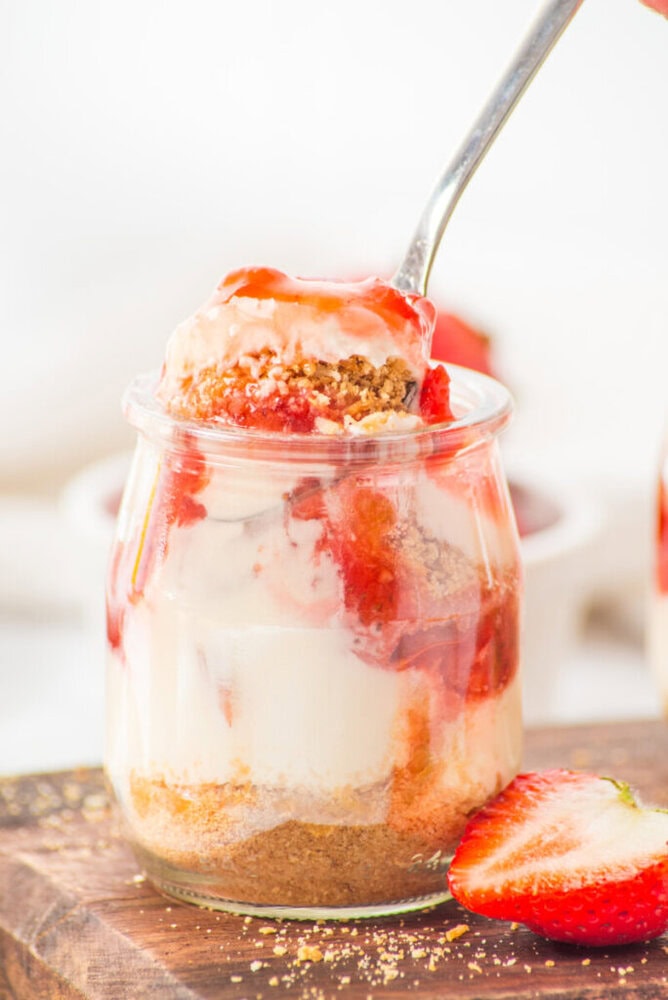
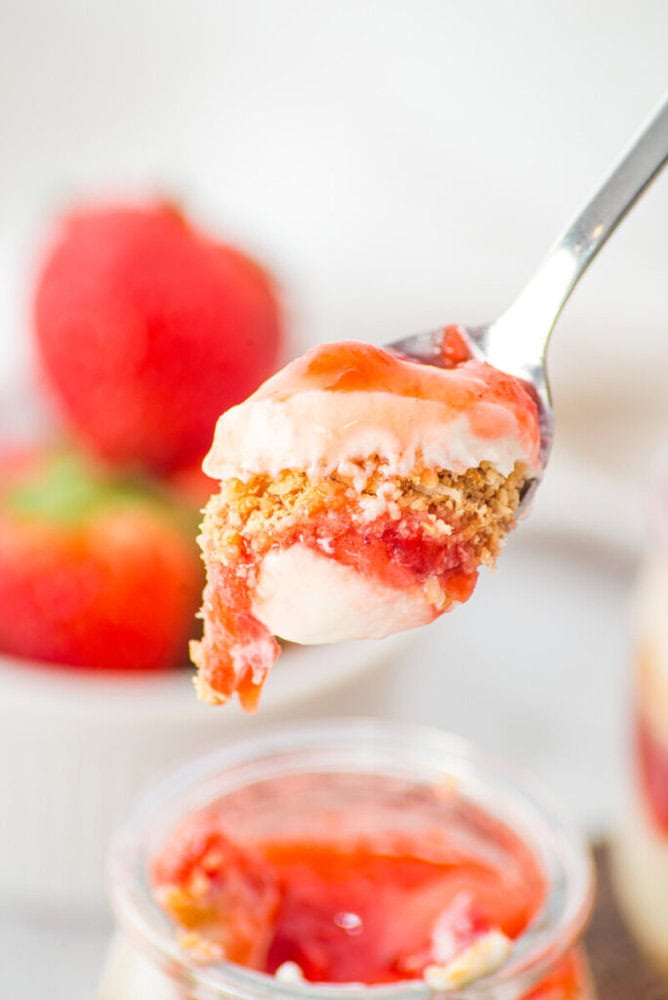
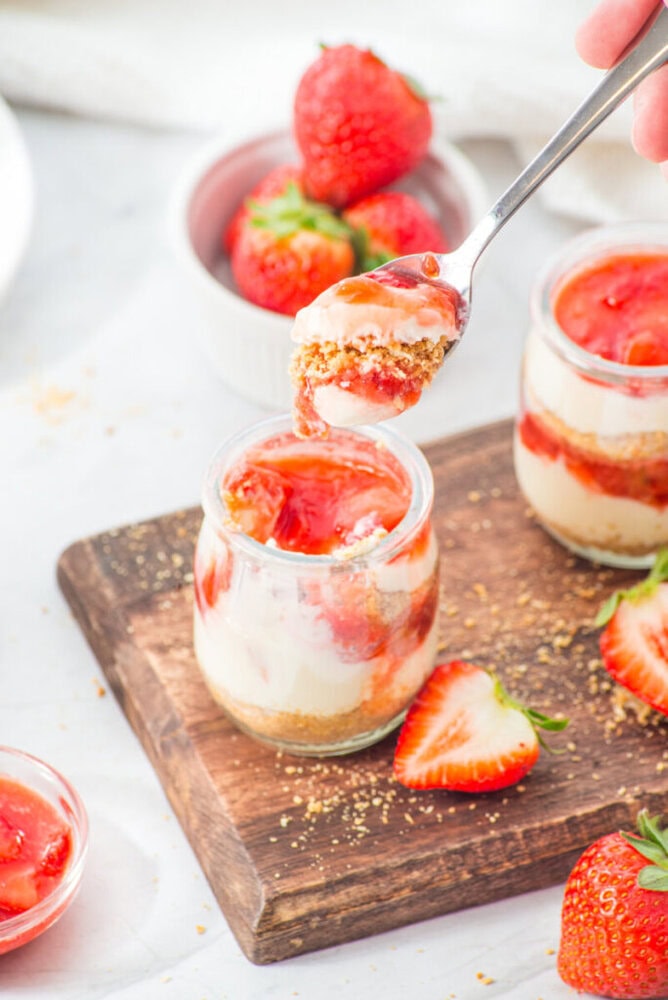
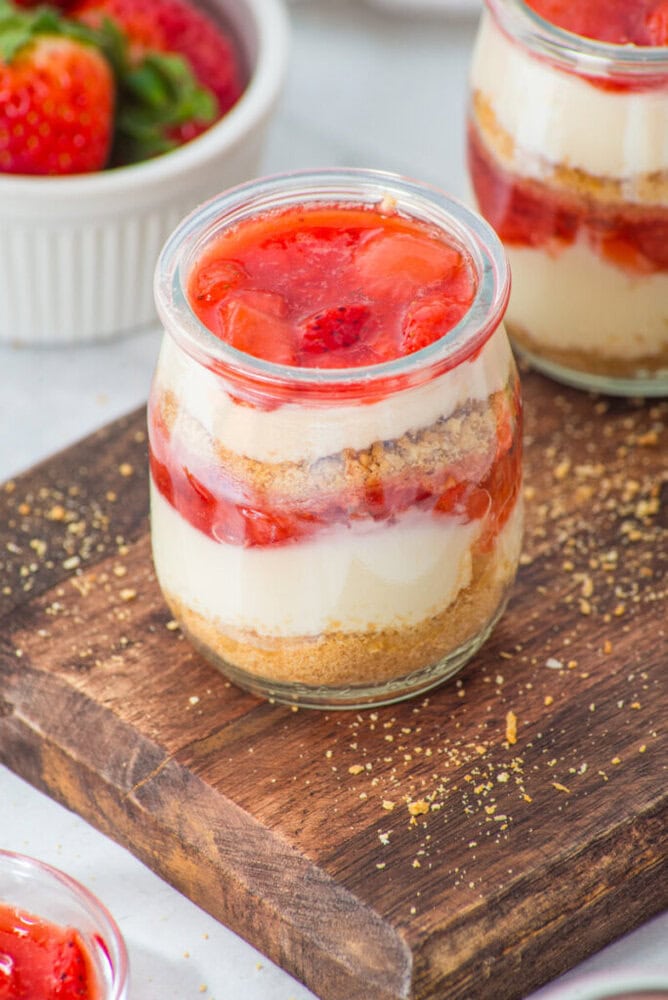
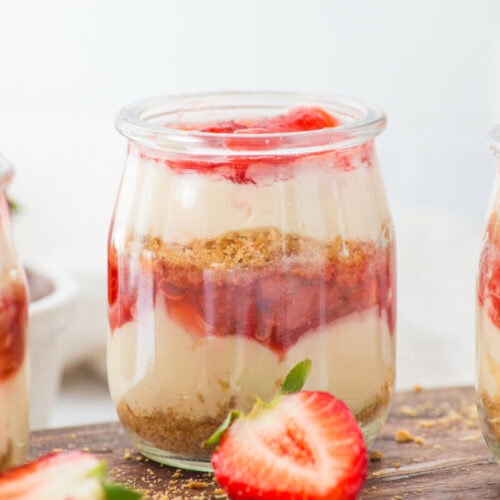
Step 4: Assemble the cups
Spoon about two tablespoons of the cookie and coconut base into the bottom of each cup. Add a layer of the cream cheese filling, smoothing gently. Spoon strawberry sauce over the top. Repeat layers if your cups allow, finishing with strawberry sauce. Add fresh strawberries or extra coconut if desired.
Step 5: Chill
Refrigerate the assembled cups for at least one hour. This helps the layers set and allows the flavors to come together beautifully.

Tips, Tricks and Storage
- Chill Before Serving: Let the dessert cups chill in the refrigerator for at least 1 hour (or even overnight) for a firmer texture and more intense flavors.
- Use Fresh Strawberries When Possible: They’ll give you the best color and natural sweetness. If using frozen berries, thaw and drain them first to prevent the topping from becoming watery.
- Use Your Gadgets: Using a piping bag for the filling makes it easier to layer and helps if you’re making several cups at once. For the fruit sauce, use a blender for a smoother texture instead of a chunky one.
- Add Crunch Before Serving: If you’re topping with extra cookie crumbs or nuts, sprinkle them on just before serving to keep them crisp. If you add them ahead of time, they risk becoming soggy.
- Storage: Keep the cups covered in an airtight container and refrigerated for up to 3 days. The flavors will intensify over time.
Substitutions and Variations
Swap strawberries for raspberries, blueberries, mango, or a mix of berries. You can also change up the crust by using graham crackers, shortbread, or even chocolate cookies instead.
Want a gluten-free option? Substitute traditional cookies for gluten-free cookies, such as almond cookies, rice crackers, or a mix of almond flour and shredded coconut. You can also use gluten-free granola or grind nuts. Use what you have at home and have fun with it!
Frequently Asked Questions
Q: Can I make these in advance?
Yes! They’re perfect make-ahead desserts. Assemble the cups, cover, and refrigerate overnight. Add toppings right before serving to prevent them from becoming soggy.
Q: Can I use low-fat cream cheese or Greek yogurt instead?
You can. The texture will be a bit lighter and less rich, but still creamy and flavorful.
Q: What if I don’t have small cups?
Use small mason jars, ramekins, or even wine glasses for an elegant presentation.
Q: Can I make a large version instead of individual cups?
Definitely — layer everything in a large dish or baking pan and serve it family-style.
Craving more super tasty treats? Try Blueberry Cheesecake Popsicles, Strawberry Lemonade Popsicles, or Blackberry Muffins next!
Strawberry Cheescake Cups
Ingredients
Base:
- 1 cup crushed cookies Graham crackers or vanilla cookies, approx. 15 to 18 cookies
- ⅓ cup shredded coconut
Filling:
- 1 cup cream cheese
- ½ cup heavy cream
- ½ cup powdered sugar
- 1 tsp vanilla extract
Strawberry Sauce:
- 1 ½ cups strawberries diced
- 3 tbsp powdered sugar
Instructions
- Step 1: Prepare the base – Preheat your oven to 320 to 340 degrees Fahrenheit. In a bowl, mix the crushed cookies and shredded coconut until evenly combined. Spread the mixture out on a baking sheet in an even layer. Bake for 7 to 10 minutes, stirring once if needed, until the coconut is lightly golden and fragrant. Let it cool completely before using. This step adds flavor and keeps the base from tasting raw.
- Step 2: Make the strawberry sauce – Add the diced strawberries and 3 tablespoons of powdered sugar to a saucepan over medium heat. Stir gently as the strawberries release their juices. Use a wooden spoon or spatula to lightly mash them as they soften. Cook until the mixture thickens into a spoonable sauce. Remove from heat and let it cool fully so it does not melt the cream layer.
- Step 3: Prepare the cream filling – In a mixing bowl, beat the cold heavy cream with the powdered sugar and vanilla extract for about one minute until slightly thickened. Add the cream cheese and continue beating until smooth and fully combined. The filling should be creamy and soft, not stiff.
- Step 4: Assemble the cups – Spoon about two tablespoons of the cookie and coconut base into the bottom of each cup. Add a layer of the cream cheese filling, smoothing gently. Spoon strawberry sauce over the top. Repeat layers if your cups allow, finishing with strawberry sauce. Add fresh strawberries or extra coconut if desired.
- Step 5: Chill – Refrigerate the assembled cups for at least one hour. This helps the layers set and allows the flavors to come together beautifully.