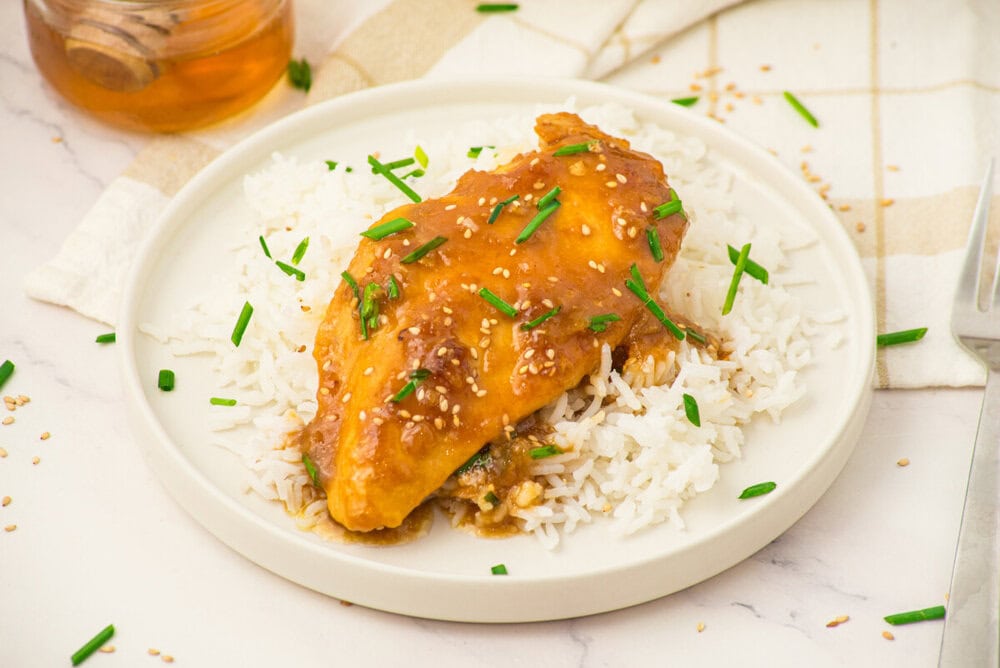
Honey Butter Chicken

There is something about a skillet dinner that smells warm and buttery before anyone even knows what is coming to the table. On a busy evening, when backpacks are still by the door and somebody is asking what is for dinner before I have even taken my shoes off, that smell buys me a little breathing room.
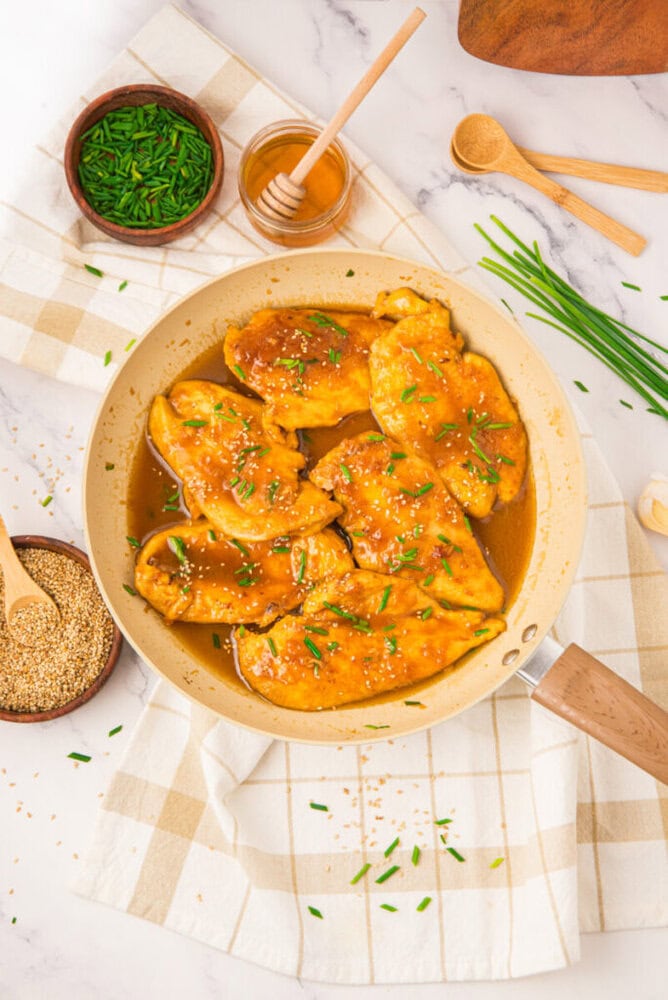
You get the soft sizzle from the pan, sweet honey warming with garlic, and those browned edges that make everyone wander into the kitchen.
Honey Butter Chicken joined our regular dinner rotation during one of those stretches when every weeknight felt packed from the minute school ended until bedtime. I wanted something hearty and familiar that did not require a pile of dishes or an hour of chopping.
✉ Never miss a recipe — grab Chicken Recipes Cookbook free
Drop your email and we’ll take care of the rest
Get It NowMore than anything, I wanted chicken that my family would actually be excited to see on their plates.
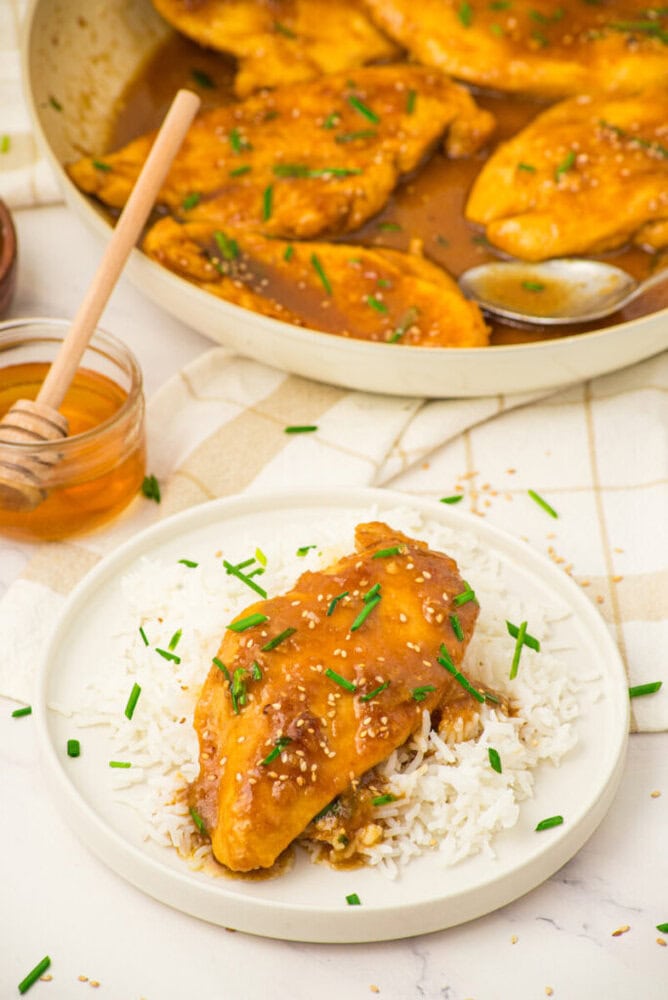
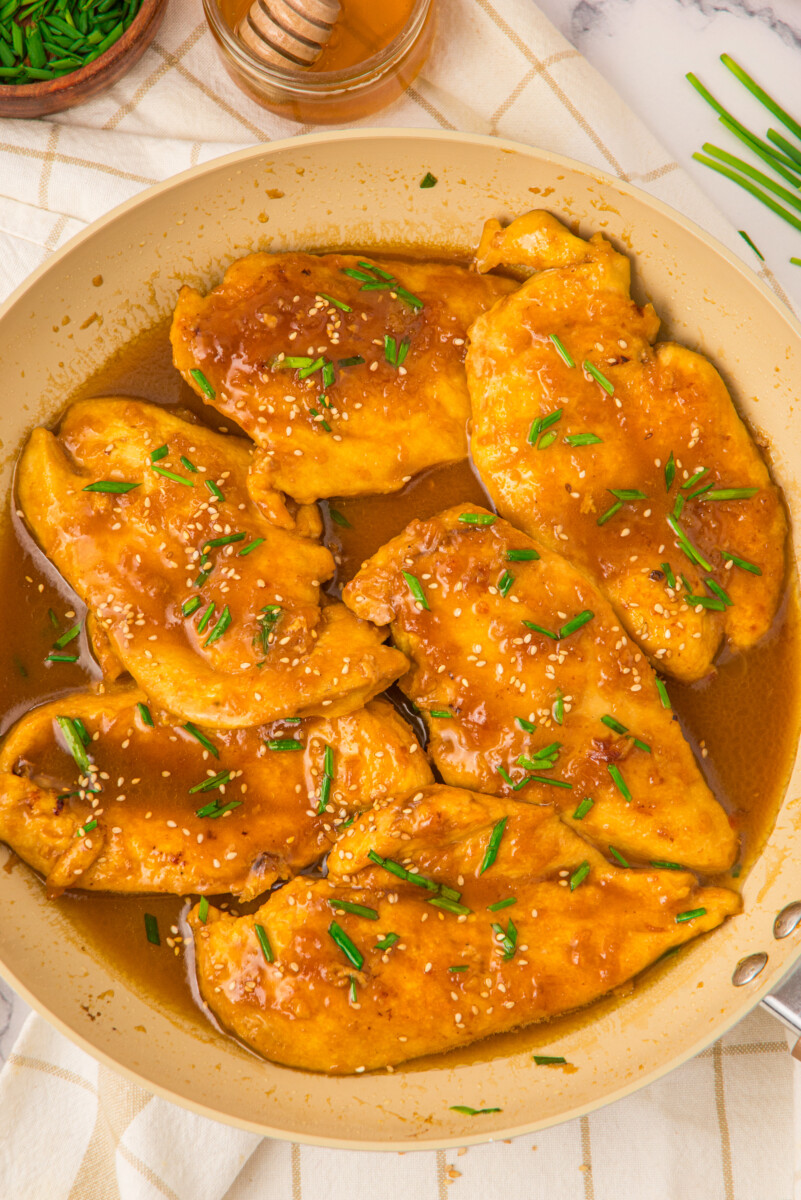
This recipe takes simple skillet chicken and gives it the kind of glossy, savory sweet sauce that makes plain rice disappear fast. The chicken stays tender inside with lightly crisp edges, while the honey butter sauce turns silky and thick enough to cling to every bite.
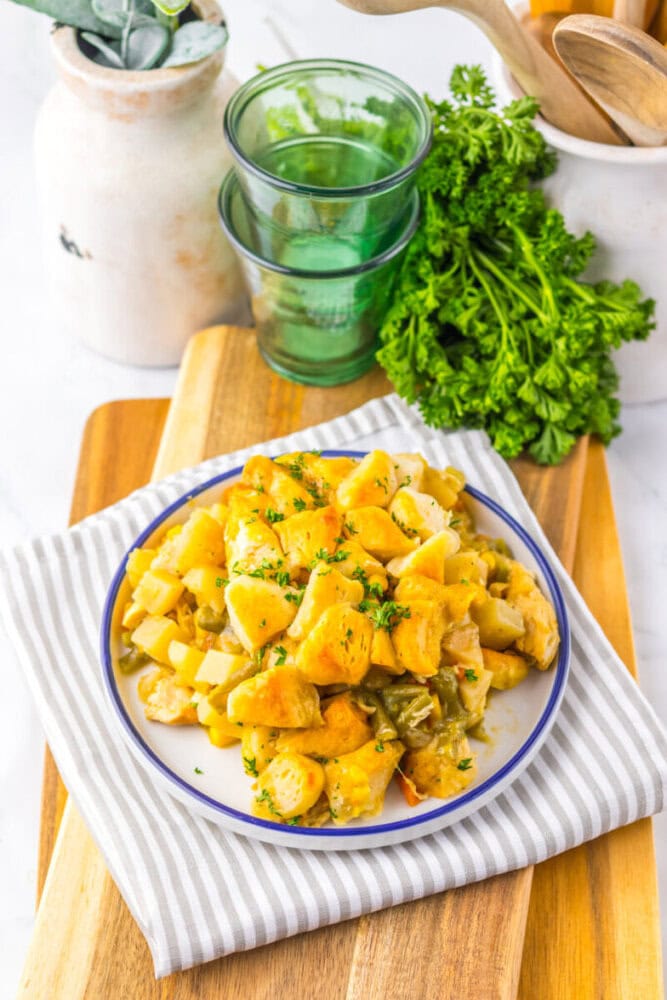
You get garlic, butter, a little tang, and just enough soy sauce to keep the sweetness balanced. It feels special enough for Sunday dinner but works beautifully on a random Tuesday night.
And that is what keeps me coming back to it. You brown the chicken, stir together a quick sauce, let everything bubble for a few minutes, and dinner is basically handled.
It tastes like you tried a whole lot harder than you did, which is a useful little victory when the whole family is hungry, and I have a feeling it will earn a permanent spot in your rotation too.
What Is Honey Butter Chicken?
Honey Butter Chicken is a simple skillet chicken dinner made with thin chicken breast cutlets and a glossy sauce of honey, butter, soy sauce, garlic, chicken broth, and apple cider vinegar.
The chicken gets a light coating of cornstarch before it goes into a hot skillet. That cornstarch does two important jobs.
First, it helps the outside of the chicken develop a beautiful golden crust. Second, the little bit of cornstarch left behind in the skillet helps thicken the sauce later.
Once the chicken is browned, the sauce comes together right in the same pan. Butter and garlic pick up all those flavorful browned bits on the bottom, then honey, soy sauce, broth, and vinegar simmer until everything becomes glossy and spoonable.
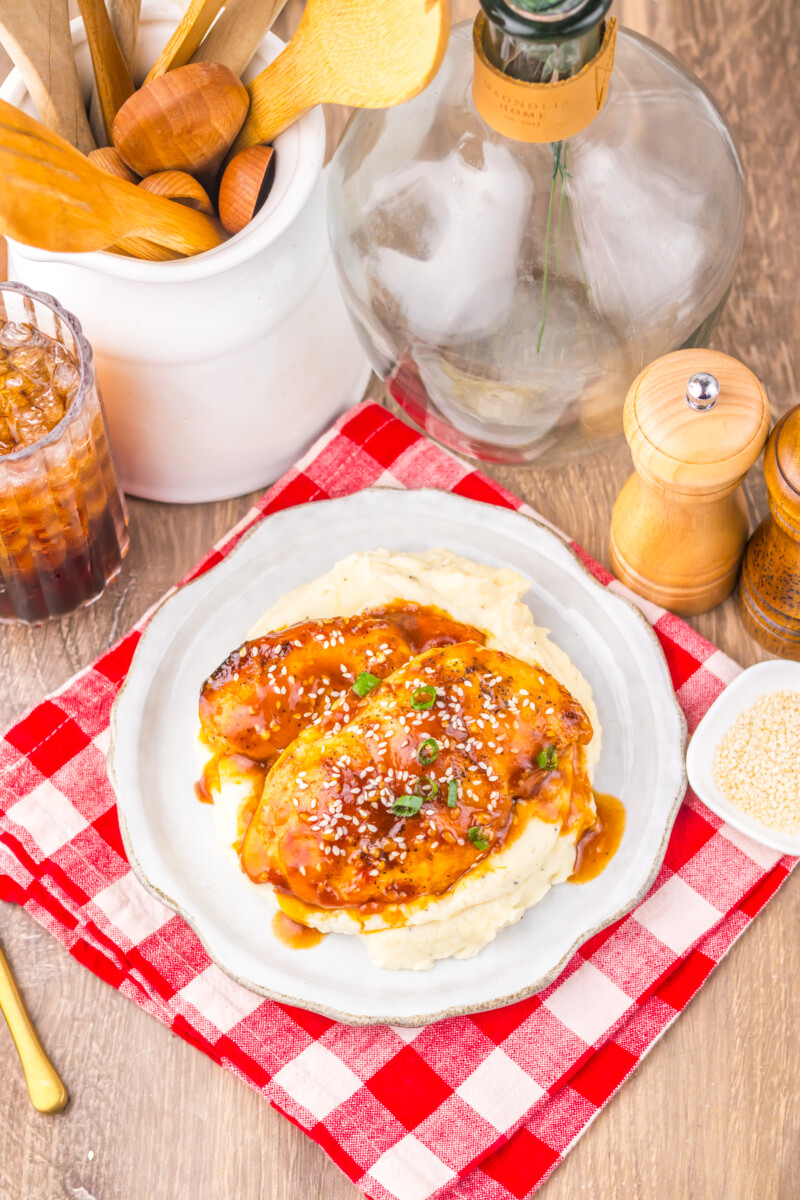
What I like most is that the sauce lands right in the middle between sweet and savory. The honey makes it comforting and familiar for kids, while the soy sauce, garlic, and vinegar keep it interesting enough for the grown ups at the table.
It is the kind of chicken dinner that looks like it took some planning, but you can have it ready in about 35 to 40 minutes.
Why You’ll Love This Recipe
- It works on busy nights: You can get Honey Butter Chicken from the refrigerator to the dinner table in about 35 to 40 minutes, which makes it realistic for a weeknight.
- The sauce is family friendly: Honey gives the sauce a gentle sweetness while soy sauce, garlic, butter, and vinegar keep it savory and balanced.
- The chicken stays tender: Slicing the breasts into thinner pieces helps them cook quickly and evenly without drying out.
- You only need one main skillet: The chicken browns and the sauce cooks in the same pan, so cleanup stays manageable when you already have enough going on.
- It goes with almost anything: Rice, mashed potatoes, noodles, and roasted vegetables all work beautifully with the buttery honey sauce.
- The leftovers are worth keeping: The sauce settles into the chicken overnight, making this one of those dinners I am happy to warm up for lunch the next day.
When to Serve This Recipe
- Busy school nights: The short cooking time makes this a good choice when homework, activities, baths, and bedtime are all competing for the same couple of hours.
- Casual Sunday dinners: Pair it with mashed potatoes and vegetables for an easy family meal that still feels a little more special.
- Dinner with picky eaters: The familiar honey butter flavor tends to be approachable, and you can serve extra sauce on the side for anyone who wants more.
- Meal prep days: Cook a batch and portion it with rice and vegetables for lunches that reheat nicely.
- Last minute company: This chicken looks glossy and impressive on a serving platter, even though the ingredient list is wonderfully straightforward.
Ingredients
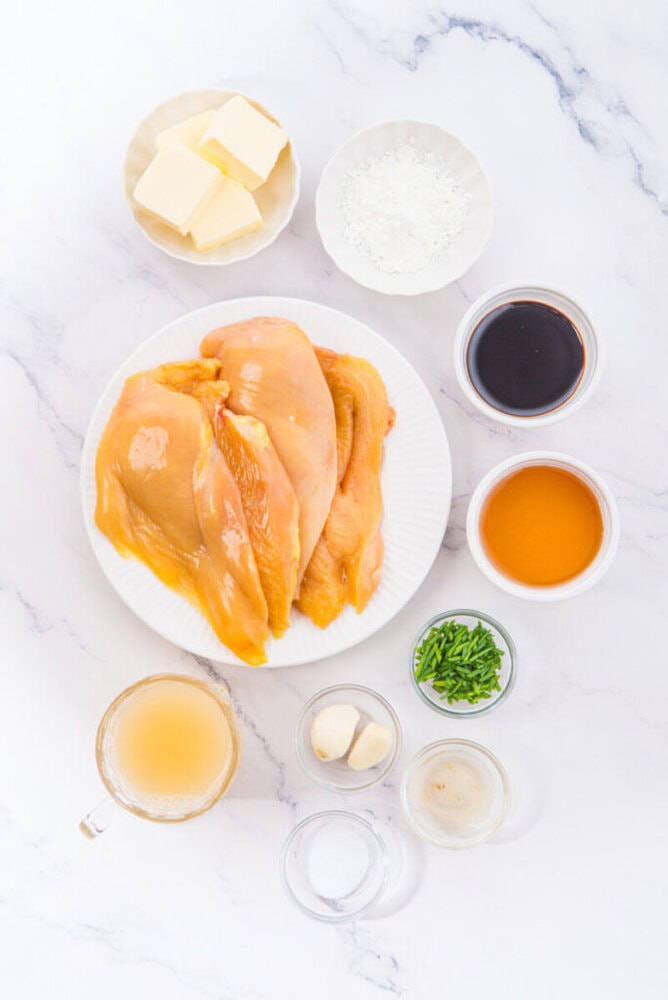
- 1 pound chicken breasts, about 2 to 3 breasts: Slice each breast into thin, even cutlets so the chicken browns quickly and cooks at the same rate.
- Salt, to taste: Use a light hand because the soy sauce already brings plenty of salty flavor to the finished dish.
- 3 tablespoons cornstarch: This creates a delicate coating on the chicken and also helps the sauce thicken.
- 1 tablespoon butter: Use this first portion for browning the chicken in the skillet.
- 4 tablespoons honey: Honey provides the sweetness and gives the finished sauce its glossy texture.
- 2 tablespoons soy sauce: This adds savory depth and balances the sweetness of the honey.
- 1 half cup chicken broth: Broth loosens the sauce and gives it enough liquid to simmer around the chicken.
- 1 tablespoon apple cider vinegar: The acidity cuts through the butter and honey so the sauce does not taste overly sweet.
- 3 tablespoons butter: This second portion melts into the sauce and gives it a rich, smooth finish.
- 2 garlic cloves, minced: Fresh garlic adds warmth and savory flavor, but it only needs a brief turn in the skillet.
- Chopped chives, for garnish: Chives add a fresh onion flavor and a little color right before serving.
- 1 teaspoon sesame seeds, optional: Sprinkle these on at the end if you like a little extra texture and a simple finishing touch.
How to Make Honey Butter Chicken
Step 1: Slice the Chicken into Thin Cutlets
Start by placing the chicken breasts on a cutting board and slicing each one horizontally through the middle. You should end up with about 4 to 6 thinner pieces, depending on the size of your chicken breasts.
Aim for pieces that are roughly one half inch thick. Keeping them fairly even matters because thin cutlets cook quickly, and similar sizes mean you are less likely to have one piece drying out while another is still finishing.
I also like to pat the chicken dry with paper towels at this point. A dry surface gives the cornstarch a better chance to stick and helps the chicken brown instead of steaming.
Step 2: Season and Coat the Chicken
Season the chicken lightly with salt, remembering that the soy sauce will add more salt later. Put the cornstarch on a shallow plate and press each chicken cutlet into it, coating both sides.
Shake off the extra cornstarch before moving the chicken to a clean plate. You want a thin, even dusting rather than a thick white layer.
That light coating is enough to give you golden edges while leaving behind just enough starch in the skillet to help the sauce become glossy and thick.
Step 3: Brown the Chicken Until Golden
Heat 1 tablespoon of butter in a large skillet over medium high heat. Give the pan a moment to get properly hot before adding the chicken.
This is one place where a little patience pays off. If the skillet is not hot enough, the chicken releases moisture and steams rather than browns.
Place the cutlets in the skillet without crowding them and cook for about 4 to 5 minutes per side. You are looking for a deep golden color on the outside and chicken that is nearly cooked through.
Transfer the browned pieces to a plate while you make the sauce.
Step 4: Mix the Honey Sauce
While the chicken rests, combine the honey, soy sauce, chicken broth, and apple cider vinegar in a small bowl. Stir until the honey loosens and everything is evenly blended.
I like mixing the sauce separately because it lets you pour everything into the hot skillet at once. That gives the ingredients a chance to come together evenly instead of having the honey stick to one section of the pan while you scramble to measure the rest.
Step 5: Melt the Butter and Cook the Garlic
Return your attention to the same skillet and add the remaining 3 tablespoons of butter. Once it melts, add the minced garlic and stir constantly for about 30 seconds.
You should smell the garlic almost immediately. As soon as it becomes fragrant, you are ready for the next step.
Garlic can turn bitter when it burns, and with a hot skillet it can go from fragrant to too dark surprisingly quickly. Keeping this part brief gives you that mellow garlic flavor without any bitterness.
Step 6: Build the Honey Butter Sauce
Pour the honey mixture into the skillet and stir well. Use a wooden spoon or sturdy spatula to scrape along the bottom of the pan as the sauce begins to simmer.
Those browned bits left behind from the chicken are packed with flavor, and this is where they get pulled into the sauce instead of being left stuck to the skillet. You will also be incorporating some of the cornstarch that remained after browning the chicken.
As the sauce heats, you should notice it becoming a little smoother and slightly thicker.
Step 7: Return the Chicken to the Skillet
Place the browned chicken cutlets back into the skillet, nestling them directly into the honey butter sauce. Spoon some of the sauce over the top of every piece so each cutlet is well coated.
At my house, this is usually the moment someone walks into the kitchen asking how much longer dinner will be because the smell of honey, garlic, and butter makes it very hard to ignore what is happening on the stove.
Step 8: Simmer Until the Sauce Thickens
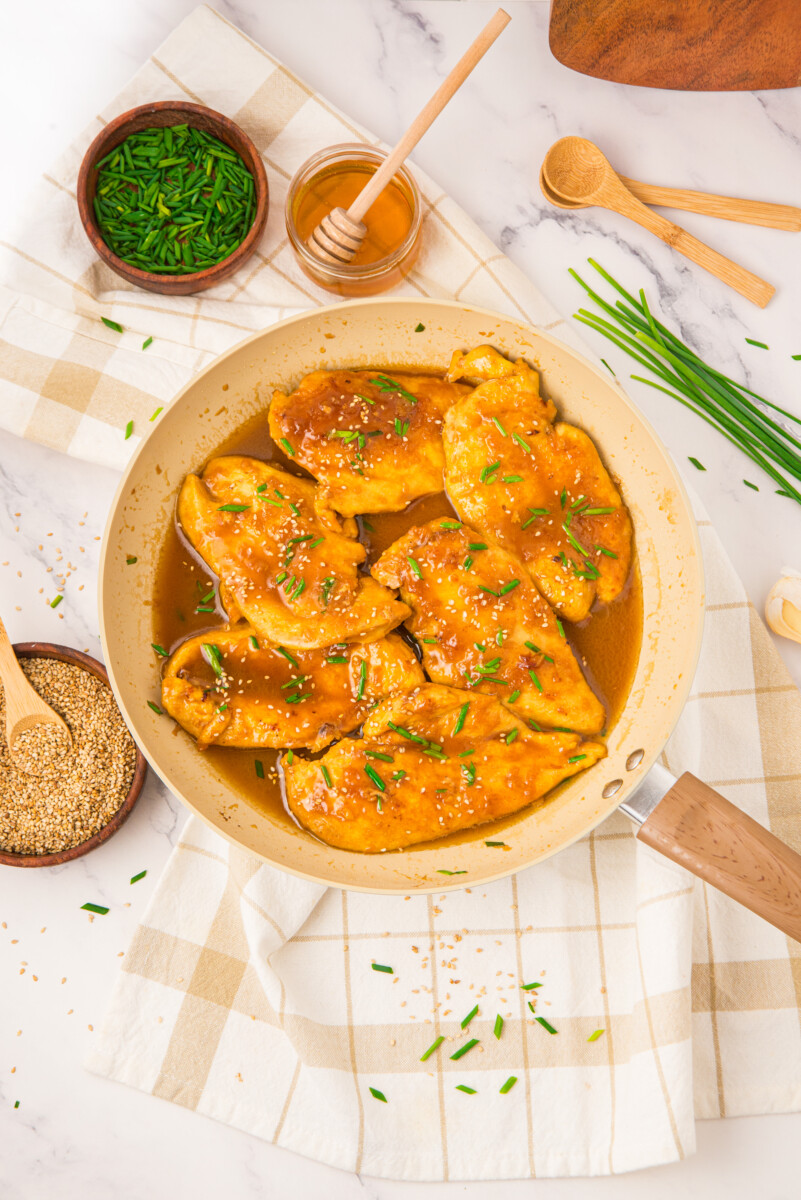
Lower the heat enough to keep the sauce at a gentle simmer. Let the chicken cook for another few minutes, turning the pieces or spooning sauce over them occasionally.
As the liquid reduces, the sauce will become thicker and shinier. Keep an eye on it because honey can scorch if the heat gets too aggressive.
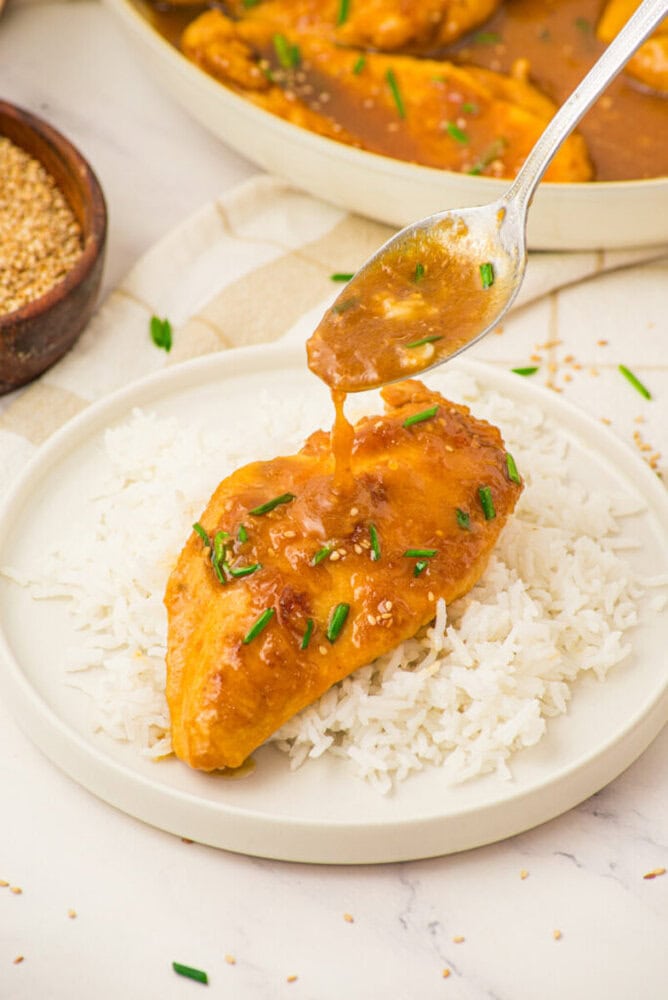
You want the sauce thick enough to coat the back of a spoon but still loose enough to drizzle over whatever you are serving alongside the chicken. Make sure the chicken reaches a safe internal temperature of 165°F before removing the skillet from the heat.
Step 9: Garnish and Serve
Take the skillet off the heat and scatter chopped chives over the chicken. Add sesame seeds if you are using them.
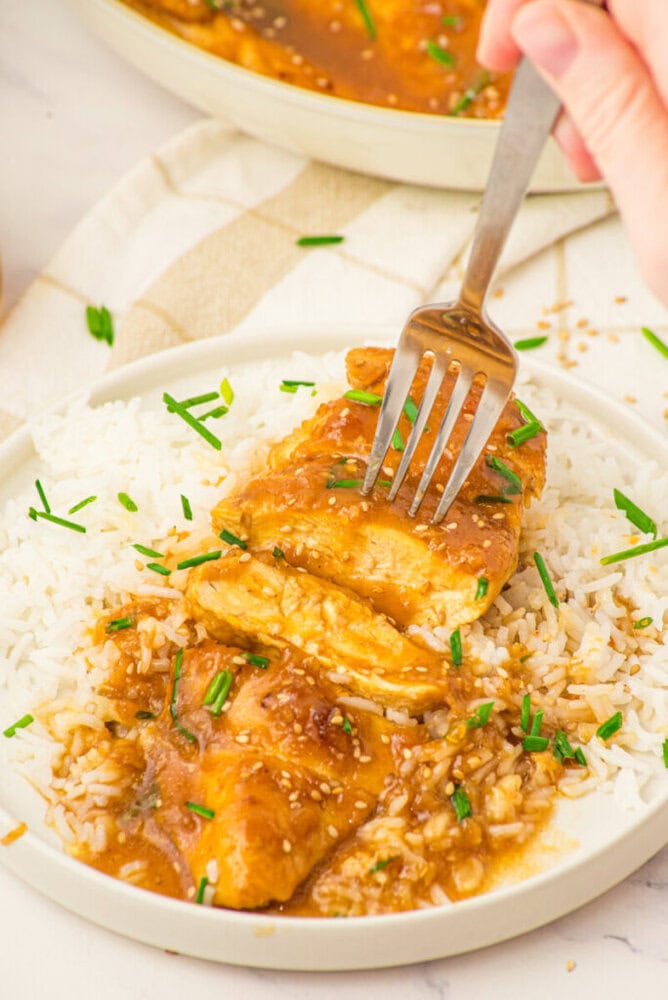
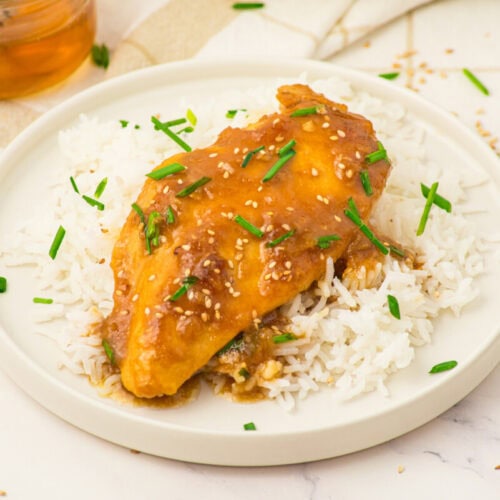
I usually spoon a little extra sauce over each piece just before it reaches the table because nobody at my house has ever complained about extra honey butter sauce. Serve the chicken while it is warm, preferably with something underneath it that can catch every last spoonful from the skillet.
Substitutions
- Chicken thighs: Boneless skinless chicken thighs can replace the breasts, although they may need a little extra cooking time depending on their thickness.
- Rice vinegar: Use rice vinegar in place of apple cider vinegar for a mild, slightly sweeter tang.
- White vinegar: Regular white vinegar works in a pinch, but start with a little less since its flavor can be sharper.
- Low sodium soy sauce: This is a useful swap if you prefer more control over the salt level in the finished sauce.
- Green onions: Thinly sliced green onions can replace the chives and give you a slightly stronger onion flavor.
- Vegetable broth: Vegetable broth can stand in for chicken broth if that is what you already have in the pantry.
Variations
- Add a little heat: Stir red pepper flakes or a small spoonful of chili sauce into the honey mixture for a sweet and spicy version.
- Add ginger: A teaspoon of freshly grated ginger cooked briefly with the garlic gives the sauce a warm, aromatic note.
- Make it extra garlicky: Add another clove or two of garlic if your family likes a stronger savory flavor.
- Finish with lemon: A small squeeze of fresh lemon juice at the end brightens the rich butter and honey.
- Add vegetables to the skillet: Quickly cooked broccoli, green beans, or sliced bell peppers can be folded into the sauce before serving.
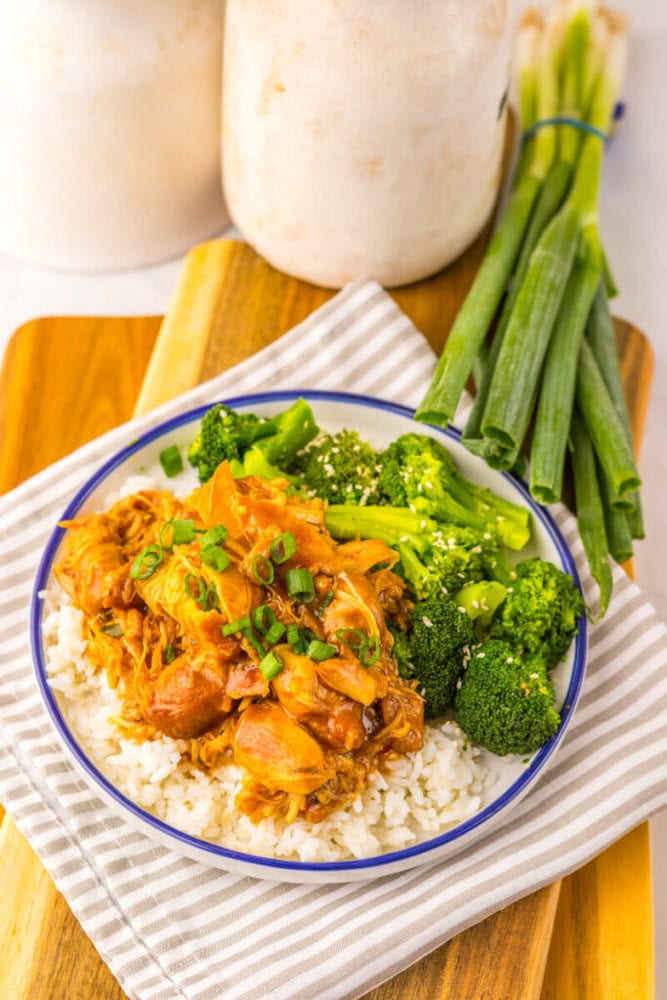
- Turn it into bowls: Slice the finished chicken and serve it over rice with steamed vegetables, cucumbers, and extra chives for an easy family dinner bowl.
Tips and Tricks
- Cut the chicken evenly: Similar sized cutlets cook at the same speed, which helps keep every piece tender.
- Dry the chicken first: Patting away surface moisture makes it easier for the cornstarch to cling and helps the exterior brown.
- Get the skillet hot: A properly heated pan encourages browning instead of steaming.
- Do not overload the pan: If your skillet is small, brown the chicken in batches so each piece has room to make contact with the hot surface.
- Watch the garlic closely: Thirty seconds is usually plenty because burnt garlic can make the whole sauce taste bitter.
- Scrape up the browned bits: Those little bits on the bottom of the skillet dissolve into the sauce and add a lot of savory flavor.
- Taste before adding more salt: Soy sauce can vary in saltiness, so wait until the sauce comes together before deciding it needs anything extra.
- Keep the simmer gentle: Honey can burn if the sauce boils too aggressively, so reduce the heat once the chicken goes back into the skillet.
- Stop reducing at the right moment: The sauce continues to thicken slightly as it cools, so remove it from the heat while it is still easy to spoon.
FAQs
Can I Use Chicken Thighs Instead of Chicken Breasts?
Yes. Boneless skinless chicken thighs are a great choice if your family prefers darker meat.
Try to choose pieces that are similar in thickness so they cook evenly. Because thighs can vary more in size than sliced chicken breast cutlets, rely on the internal temperature rather than only the clock.
Cook them until they reach 165°F in the thickest part.
Why Do You Coat the Chicken in Cornstarch?
Cornstarch helps the chicken develop a lightly crisp, golden exterior without creating a heavy breading. It also plays a second role later.
Some of that starch remains in the pan after the chicken is browned, and when the sauce is added, it helps the honey butter mixture thicken and cling to the chicken.
Can I Make Honey Butter Chicken Ahead of Time?
You can cook the chicken ahead and refrigerate it for up to 3 days. For the nicest texture, reheat it gently in a skillet over low heat.
Add a small splash of chicken broth if the sauce has become too thick in the refrigerator. I find that lower heat works better than rushing the reheating process because it keeps the chicken tender and gives the sauce time to loosen.
How Do I Know When the Chicken Is Done?
The safest and simplest way is to check the thickest part of the chicken with an instant read thermometer. It should reach 165°F.
Because these cutlets are thin, they cook fairly quickly, so start checking as soon as they have browned and spent a few minutes simmering in the sauce.
Why Is My Honey Butter Sauce Too Thick?
The sauce may have reduced a little longer than necessary. Honey and cornstarch can thicken quickly once the liquid starts evaporating.
Stir in a tablespoon or two of chicken broth and warm it gently until the sauce reaches the consistency you want. It should coat the chicken while still being easy to spoon over rice or potatoes.
Can I Double This Recipe?
Absolutely. If you are feeding a bigger family or want leftovers, double the ingredients.
I would brown the chicken in batches rather than trying to fit everything into the skillet at once. Crowding the pan traps steam and makes it much harder to get those golden edges.
Once all the chicken is browned, you can make a larger batch of sauce in the same skillet and return the chicken to finish cooking.
Serving Ideas
- Steamed white rice: Rice is my usual choice because it catches every bit of honey butter sauce and turns it into part of the meal.
- Mashed potatoes: Creamy mashed potatoes make this dinner feel especially cozy and work beautifully with the buttery sauce.
- Egg noodles: Toss warm noodles with a little of the sauce and place sliced chicken over the top for a kid friendly dinner.
- Roasted broccoli: The slightly crisp edges of roasted broccoli provide a nice contrast to the sweet, glossy chicken.
- Green beans: Simple steamed or sautéed green beans keep the plate fresh without competing with the sauce.
- Roasted carrots: Their natural sweetness works well with the honey while their browned edges add another texture to the plate.
- Simple cucumber salad: Cool cucumbers dressed with a little vinegar offer a refreshing contrast to the rich skillet sauce.
Storage and Make Ahead Tips
- Refrigerate leftovers promptly: Store cooled Honey Butter Chicken in an airtight container in the refrigerator for up to 3 days.
- Keep the sauce with the chicken: Storing everything together helps protect the chicken from drying out and gives you plenty of sauce for reheating.
- Reheat gently: Warm leftovers in a covered skillet over low heat with a splash of chicken broth or water if the sauce has become too thick.
- Freeze for longer storage: Place cooled chicken and sauce in a freezer safe airtight container and freeze for up to 3 months.
- Thaw before reheating: Move frozen chicken to the refrigerator overnight so it can thaw gradually before you warm it.
- Prep the chicken early: You can slice the chicken into cutlets earlier in the day and keep it covered in the refrigerator until dinner time.
- Mix the sauce ahead: Combine the honey, soy sauce, broth, and vinegar and refrigerate it in a covered container until you are ready to cook.
Honey Butter Chicken
Ingredients
- 1 lb chicken breasts about 2 to 3 breasts, sliced into thin cutlets
- salt to taste
- 3 tbsp cornstarch
- 1 tbsp butter for browning the chicken
- 4 tbsp honey
- 2 tbsp soy sauce
- ½ cup chicken broth
- 1 tbsp apple cider vinegar
- 3 tbsp butter for the sauce
- 2 cloves garlic minced
- chives chopped, for garnish
- 1 tsp sesame seeds optional, for garnish
✉ Never miss a recipe — grab Chicken Recipes Cookbook free
Drop your email and we’ll take care of the rest
Get It NowInstructions
- Step 1: Slice the Chicken into Thin Cutlets – Start by placing the chicken breasts on a cutting board and slicing each one horizontally through the middle. You should end up with about 4 to 6 thinner pieces, depending on the size of your chicken breasts. Aim for pieces that are roughly one half inch thick. Keeping them fairly even matters because thin cutlets cook quickly, and similar sizes mean you are less likely to have one piece drying out while another is still finishing. I also like to pat the chicken dry with paper towels at this point. A dry surface gives the cornstarch a better chance to stick and helps the chicken brown instead of steaming.
- Step 2: Season and Coat the Chicken – Season the chicken lightly with salt, remembering that the soy sauce will add more salt later. Put the cornstarch on a shallow plate and press each chicken cutlet into it, coating both sides. Shake off the extra cornstarch before moving the chicken to a clean plate. You want a thin, even dusting rather than a thick white layer. That light coating is enough to give you golden edges while leaving behind just enough starch in the skillet to help the sauce become glossy and thick.
- Step 3: Brown the Chicken Until Golden – Heat 1 tablespoon of butter in a large skillet over medium high heat. Give the pan a moment to get properly hot before adding the chicken. This is one place where a little patience pays off. If the skillet is not hot enough, the chicken releases moisture and steams rather than browns. Place the cutlets in the skillet without crowding them and cook for about 4 to 5 minutes per side. You are looking for a deep golden color on the outside and chicken that is nearly cooked through. Transfer the browned pieces to a plate while you make the sauce.
- Step 4: Mix the Honey Sauce – While the chicken rests, combine the honey, soy sauce, chicken broth, and apple cider vinegar in a small bowl. Stir until the honey loosens and everything is evenly blended. I like mixing the sauce separately because it lets you pour everything into the hot skillet at once. That gives the ingredients a chance to come together evenly instead of having the honey stick to one section of the pan while you scramble to measure the rest.
- Step 5: Melt the Butter and Cook the Garlic – Return your attention to the same skillet and add the remaining 3 tablespoons of butter. Once it melts, add the minced garlic and stir constantly for about 30 seconds. You should smell the garlic almost immediately. As soon as it becomes fragrant, you are ready for the next step. Garlic can turn bitter when it burns, and with a hot skillet it can go from fragrant to too dark surprisingly quickly. Keeping this part brief gives you that mellow garlic flavor without any bitterness.
- Step 6: Build the Honey Butter Sauce – Pour the honey mixture into the skillet and stir well. Use a wooden spoon or sturdy spatula to scrape along the bottom of the pan as the sauce begins to simmer. Those browned bits left behind from the chicken are packed with flavor, and this is where they get pulled into the sauce instead of being left stuck to the skillet. You will also be incorporating some of the cornstarch that remained after browning the chicken. As the sauce heats, you should notice it becoming a little smoother and slightly thicker.
- Step 7: Return the Chicken to the Skillet – Place the browned chicken cutlets back into the skillet, nestling them directly into the honey butter sauce. Spoon some of the sauce over the top of every piece so each cutlet is well coated. At my house, this is usually the moment someone walks into the kitchen asking how much longer dinner will be because the smell of honey, garlic, and butter makes it very hard to ignore what is happening on the stove.
- Step 8: Simmer Until the Sauce Thickens – Lower the heat enough to keep the sauce at a gentle simmer. Let the chicken cook for another few minutes, turning the pieces or spooning sauce over them occasionally. As the liquid reduces, the sauce will become thicker and shinier. Keep an eye on it because honey can scorch if the heat gets too aggressive. You want the sauce thick enough to coat the back of a spoon but still loose enough to drizzle over whatever you are serving alongside the chicken. Make sure the chicken reaches a safe internal temperature of 165°F before removing the skillet from the heat.
- Step 9: Garnish and Serve – Take the skillet off the heat and scatter chopped chives over the chicken. Add sesame seeds if you are using them. I usually spoon a little extra sauce over each piece just before it reaches the table because nobody at my house has ever complained about extra honey butter sauce. Serve the chicken while it is warm, preferably with something underneath it that can catch every last spoonful from the skillet.
Notes
Substitutions
- Chicken thighs: Boneless skinless chicken thighs can replace the breasts, although they may need a little extra cooking time depending on their thickness.
- Rice vinegar: Use rice vinegar in place of apple cider vinegar for a mild, slightly sweeter tang.
- White vinegar: Regular white vinegar works in a pinch, but start with a little less since its flavor can be sharper.
- Low sodium soy sauce: This is a useful swap if you prefer more control over the salt level in the finished sauce.
- Green onions: Thinly sliced green onions can replace the chives and give you a slightly stronger onion flavor.
- Vegetable broth: Vegetable broth can stand in for chicken broth if that is what you already have in the pantry.
Variations
- Add a little heat: Stir red pepper flakes or a small spoonful of chili sauce into the honey mixture for a sweet and spicy version.
- Add ginger: A teaspoon of freshly grated ginger cooked briefly with the garlic gives the sauce a warm, aromatic note.
- Make it extra garlicky: Add another clove or two of garlic if your family likes a stronger savory flavor.
- Finish with lemon: A small squeeze of fresh lemon juice at the end brightens the rich butter and honey.
- Add vegetables to the skillet: Quickly cooked broccoli, green beans, or sliced bell peppers can be folded into the sauce before serving.
- Turn it into bowls: Slice the finished chicken and serve it over rice with steamed vegetables, cucumbers, and extra chives for an easy family dinner bowl.
Tips and Tricks
- Cut the chicken evenly: Similar sized cutlets cook at the same speed, which helps keep every piece tender.
- Dry the chicken first: Patting away surface moisture makes it easier for the cornstarch to cling and helps the exterior brown.
- Get the skillet hot: A properly heated pan encourages browning instead of steaming.
- Do not overload the pan: If your skillet is small, brown the chicken in batches so each piece has room to make contact with the hot surface.
- Watch the garlic closely: Thirty seconds is usually plenty because burnt garlic can make the whole sauce taste bitter.
- Scrape up the browned bits: Those little bits on the bottom of the skillet dissolve into the sauce and add a lot of savory flavor.
- Taste before adding more salt: Soy sauce can vary in saltiness, so wait until the sauce comes together before deciding it needs anything extra.
- Keep the simmer gentle: Honey can burn if the sauce boils too aggressively, so reduce the heat once the chicken goes back into the skillet.
- Stop reducing at the right moment: The sauce continues to thicken slightly as it cools, so remove it from the heat while it is still easy to spoon.
Serving Ideas
- Steamed white rice: Rice is my usual choice because it catches every bit of honey butter sauce and turns it into part of the meal.
- Mashed potatoes: Creamy mashed potatoes make this dinner feel especially cozy and work beautifully with the buttery sauce.
- Egg noodles: Toss warm noodles with a little of the sauce and place sliced chicken over the top for a kid friendly dinner.
- Roasted broccoli: The slightly crisp edges of roasted broccoli provide a nice contrast to the sweet, glossy chicken.
- Green beans: Simple steamed or sautéed green beans keep the plate fresh without competing with the sauce.
- Roasted carrots: Their natural sweetness works well with the honey while their browned edges add another texture to the plate.
- Simple cucumber salad: Cool cucumbers dressed with a little vinegar offer a refreshing contrast to the rich skillet sauce.
Storage and Make Ahead Tips
- Refrigerate leftovers promptly: Store cooled Honey Butter Chicken in an airtight container in the refrigerator for up to 3 days.
- Keep the sauce with the chicken: Storing everything together helps protect the chicken from drying out and gives you plenty of sauce for reheating.
- Reheat gently: Warm leftovers in a covered skillet over low heat with a splash of chicken broth or water if the sauce has become too thick.
- Freeze for longer storage: Place cooled chicken and sauce in a freezer safe airtight container and freeze for up to 3 months.
- Thaw before reheating: Move frozen chicken to the refrigerator overnight so it can thaw gradually before you warm it.
- Prep the chicken early: You can slice the chicken into cutlets earlier in the day and keep it covered in the refrigerator until dinner time.
- Mix the sauce ahead: Combine the honey, soy sauce, broth, and vinegar and refrigerate it in a covered container until you are ready to cook.
Private Notes
✉ Never miss a recipe — grab Chicken Recipes Cookbook free
Drop your email and we’ll take care of the rest
Get It NowFinal Thoughts
Some dinners become regulars because they are impressive. Others stick around because everyone eats them without negotiation and you do not end the night staring at a sink full of dishes.
Honey Butter Chicken gives you a little of both.
I love that it starts with ingredients I usually recognize from my pantry and refrigerator. There is no complicated technique hiding in the instructions.
You slice the chicken thin, get some good color on it, and let the sauce do the rest.
And that sauce is what everyone remembers. It is buttery and glossy, sweet from the honey, savory from the soy sauce, and just sharp enough from the vinegar to keep you going back for another bite.
Spoon it over rice and suddenly even the plainest side dish becomes something the kids are trying to scoop up before somebody else gets the last bit.
On nights when I am tired and dinner feels like one more thing standing between us and bedtime, a meal like this helps. It gives you that comforting skillet full of golden chicken without turning the evening into a project.
Put it in the middle of the table, add whatever rice or vegetables your family will happily eat, and call everybody in. Sometimes a warm dinner, a sticky spoonful of sauce, and a few quiet minutes around the table are more than enough.