No Bake Cookie Butter Cheesecake
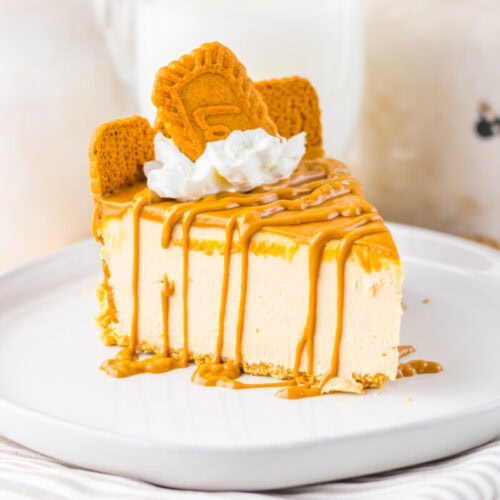
This no bake cookie butter cheesecake is rich creamy and downright comforting with a buttery Biscoff crust and a smooth cookie butter filling that feels like a hug in dessert form.
Print Recipe
Ingredients
Crust
- 1½ cups biscoff cookie crumbs
- ⅓ cup butter melted
- More cookies for the sides
Cheesecake
- 4 (8 ounce blocks) cream cheese, softened to room temperature
- 4 tablespoons sugar
- 1 ½ cup biscoff spread cookie butter
- 2 cups heavy cream
Topping
- ½ cup cookie butter
- More cookies for garnish
Instructions
- Step 1: Make the cookie crumbs - Place the Biscoff cookies into a food processor and pulse until you have fine even crumbs. Take a moment here because evenly crushed crumbs make a sturdier crust.
- Step 2: Combine with butter - Melt the butter and pour it into the cookie crumbs. Stir until everything is well combined and resembles damp sand.
- Step 3: Press the crust - Pour the crumb mixture into an eight inch springform pan. Use the bottom of a measuring cup or a metal spoon to press the crumbs firmly into the bottom and slightly up the sides.
- Step 4: Line the sides - Stand whole Biscoff cookies upright along the inside edge of the pan to create a cookie lined border. This step is optional but makes the cheesecake feel extra special.
- Step 5: Mix the filling - In a large mixing bowl use an electric hand mixer to whip together the cream cheese sugar and cookie butter until smooth and fully combined.
- Step 6: Add the cream - Pour in the heavy cream and continue mixing until the filling becomes fluffy thick and spreadable. Take care not to overmix.
- Step 7: Fill the crust - Pour the cheesecake filling over the prepared crust and use a spatula to smooth the top evenly.
- Step 8: Melt the topping - Microwave the half cup of cookie butter for thirty to forty five seconds until fully melted and smooth.
- Step 9: Finish the top - Pour the melted cookie butter over the cheesecake and gently spread it to the edges creating a glossy layer.
- Step 10: Chill - Refrigerate the cheesecake for at least six hours or freeze for four hours until fully set.
- Step 11: Slice and serve - Remove from the pan slice and serve. I like to add whipped cream a cookie and a drizzle of extra cookie butter.
Notes
Substitutions
- Biscoff cookies: Graham crackers digestive biscuits or gingersnaps work well for a similar texture.
- Cookie butter: Nutella peanut butter or chocolate spread can be used for a different flavor profile.
- Heavy cream: Whipped topping can be used for a quicker shortcut version.
- Cream cheese: Neufchâtel cream cheese works for a slightly lighter option.
Variations
- Chocolate swirl: Drizzle melted chocolate on top before chilling and gently swirl it in.
- Mini cheesecakes: Make individual portions using cupcake liners for parties.
- Holiday version: Add caramel drizzle crushed peppermint or white chocolate curls.
- Layered jars: Alternate layers of filling and cookie crumbs in small glasses.
- Crunchy topping: Sprinkle crushed cookies or toffee bits over the top.
Tips and Tricks
- Use a springform pan: This makes removal clean and easy with smooth edges.
- Chill completely: Six hours minimum ensures the cheesecake sets properly.
- Press the crust firmly: A well packed crust holds together better when slicing.
- Wipe the knife: Clean the blade between slices for neat presentation.
- Room temperature cream cheese: Prevents lumps and keeps the filling silky.
Serving Ideas
- With coffee: The spiced cookie butter pairs beautifully with a hot cup of coffee.
- After dinner dessert: Light enough to finish a meal without feeling heavy.
- Holiday dessert table: Looks beautiful alongside pies and cookies.
- Celebration dessert: Add candles or chocolate drizzle for birthdays.
- Casual gatherings: Slice and serve straight from the fridge with ease.
Storage and Make Ahead Tips
- Refrigerator storage: Store covered for up to five days.
- Freezer friendly: Freeze whole or sliced wrapped tightly.
- Make ahead crust: The crust can be made a day in advance.
- Transport tip: Keep chilled until ready to serve for best texture.
Private Notes
Servings: 8 servings
