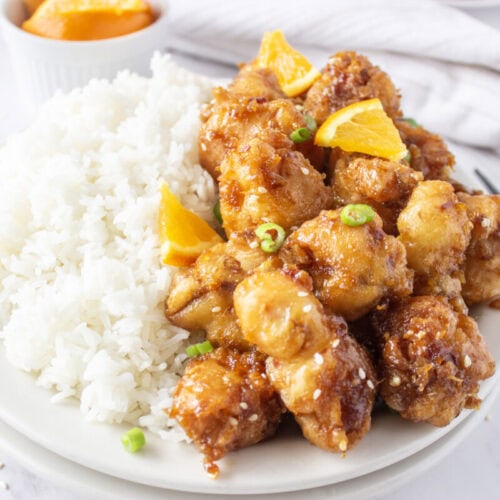
Orange Chicken
Crispy homemade orange chicken with fresh citrus flavor, gentle heat, and a glossy sticky sauce that tastes even better than takeout.
Print Recipe
Ingredients
Chicken
- 1 lb boneless skinless chicken thighs best or breasts
- 1 cup all-purpose flour
- ½ cup cornstarch
- 1 tsp salt
- ½ tsp white pepper or black pepper
- 1 egg
- 1 cup cold sparkling water key for crispiness
- 1 tsp baking powder secret crunch booster
- Coconut oil for frying
Sauce
- Juice of 1 large orange
- Zest of 1 orange
- 1 tbsp lime juice optional—this is the twist
- 2 tbsp low-sodium soy sauce
- 2 tbsp brown sugar
- 2 tbsp honey
- 2 tbsp rice vinegar
- 4 cloves garlic minced
- 1 tbsp fresh ginger grated
- 1 tsp red pepper flakes chili paste or sriracha adjust heat
- 1 tbsp cornstarch + 1 tbsp water slurry
Garnish
- Toasted sesame seeds
- Sliced green onions
- Thin orange zest strips or orange wedges optional but fancy
Instructions
- Step 1: Prep the Chicken Batter - Start by cutting the chicken into bite sized pieces that are all roughly the same size so they cook evenly. In a large bowl, whisk together the flour, cornstarch, salt, pepper, and baking powder. In another bowl, whisk the egg and cold sparkling water until combined. Pour the wet mixture into the dry ingredients and stir gently until you get a smooth batter. Add the chicken pieces and toss everything together until well coated. Let the chicken sit for about 10 to 20 minutes. That little resting time helps the coating stick better and gives you a crispier finish once fried.
- Step 2: Heat the Oil Properly - Pour coconut oil into a heavy pot or deep skillet and heat it to 350 degrees. Keeping the oil temperature steady matters more than people think. If the oil is too cool, the chicken turns greasy. Too hot and the outside burns before the inside cooks through. I usually test one small piece first before frying a full batch. If it bubbles immediately and floats gently, the oil is ready.
- Step 3: Fry the Chicken Until Crispy - Carefully add the battered chicken pieces into the hot oil in small batches. Do not overcrowd the pan or the temperature will drop too much. Fry each batch for about 2 to 3 minutes until lightly golden and cooked through. Transfer the chicken to a wire rack or paper towel lined plate. For the absolute best texture, fry the chicken a second time for another minute. This extra step makes a huge difference. The coating gets deeply crisp and stays crunchy even after being tossed in sauce.
- Step 4: Build the Orange Sauce - In a large skillet or saucepan over medium heat, combine the orange juice, orange zest, lime juice, soy sauce, brown sugar, honey, rice vinegar, garlic, ginger, and chili paste. Stir everything together and let it simmer for about 2 to 3 minutes. The kitchen starts smelling incredible at this point. The garlic and ginger mellow out while the citrus brightens everything up. Whisk together the cornstarch and water slurry, then slowly stir it into the sauce. Within a minute or two, the sauce will turn glossy and thick enough to coat the back of a spoon. Taste the sauce and adjust it if needed. Add a little more honey for sweetness, extra lime juice for tang, or more chili paste if you like extra heat.
- Step 5: Toss the Chicken Quickly - Add the crispy chicken into the sauce and toss quickly until every piece is coated. Do not let it sit too long in the pan or the coating can soften. The goal is to glaze the chicken while keeping all that crunch you worked for. This part always feels satisfying because the sauce clings beautifully to every crispy edge.
- Step 6: Garnish and Serve - Transfer the orange chicken to a serving platter and sprinkle with toasted sesame seeds, sliced green onions, and extra orange zest strips if you want a little restaurant style flair. Serve it immediately while everything is hot and crispy. Around here, it usually goes straight over steamed rice with everybody reaching for seconds before I even sit down.
Notes
Substitutions
- Chicken Breast Instead Of Thighs: Chicken breast works well if you prefer a leaner option.
- Vegetable Oil Instead Of Coconut Oil: Neutral frying oils work perfectly if coconut oil is unavailable.
- Maple Syrup Instead Of Honey: Maple syrup adds sweetness with a slightly deeper flavor.
- Tamari Instead Of Soy Sauce: Tamari is a great gluten free substitute with rich savory flavor.
- Black Pepper Instead Of White Pepper: Black pepper gives a slightly bolder flavor while still tasting delicious.
Variations
- Spicy Orange Chicken: Add extra chili paste or red pepper flakes for more heat.
- Orange Chicken Lettuce Wraps: Serve the chicken in crisp lettuce cups for a lighter option.
- Orange Shrimp: Swap the chicken for shrimp and reduce the frying time slightly.
- Extra Tangy Version: Add additional lime juice and rice vinegar for brighter flavor.
- Sticky Sweet Style: Increase the honey slightly for a sweeter glaze.
Tips and Tricks
- Keep The Sparkling Water Cold: Cold batter creates a lighter crispier coating.
- Do Not Crowd The Pan: Frying in small batches keeps the oil hot and the chicken crispy.
- Double Fry For Maximum Crunch: The second fry gives the chicken restaurant quality texture.
- Use Fresh Citrus: Fresh orange juice and zest make the sauce taste vibrant and natural.
- Toss Quickly In Sauce: Coating the chicken fast helps preserve the crunch.
- Serve Immediately: Orange chicken is always best fresh from the pan.
Serving Ideas
- Steamed Jasmine Rice: The fluffy rice soaks up every bit of the flavorful sauce.
- Vegetable Fried Rice: Adds extra texture and turns dinner into a full takeout style meal.
- Roasted Broccoli: The slight char on broccoli pairs perfectly with the citrus sauce.
- Lettuce Wraps: Crisp lettuce adds freshness and keeps things lighter.
- Stir Fried Vegetables: Bell peppers and snap peas work especially well alongside the chicken.
Storage and Make Ahead Tips
- Store Leftovers In The Fridge: Keep leftovers in an airtight container for up to 3 days.
- Reheat In The Oven: A hot oven helps restore some crispiness better than the microwave.
- Prepare Sauce Ahead: The sauce can be made a day early and stored in the refrigerator.
- Freeze Fried Chicken Separately: Freezing the chicken without sauce keeps the texture better.
- Keep Garnishes Fresh: Add sesame seeds and green onions right before serving for the best flavor.
Private Notes
Servings: 4 servings
