Sheet Pan Beef Ramen
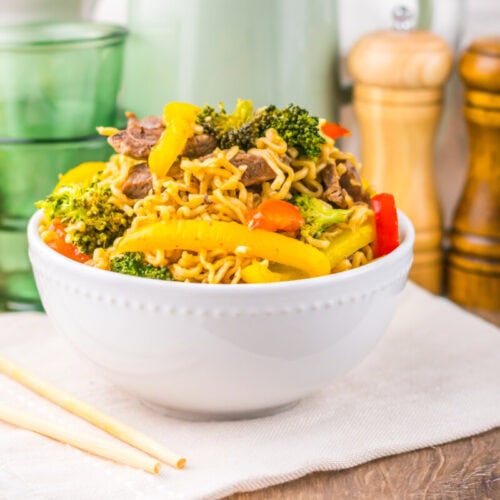
This Sheet Pan Beef Ramen is the kind of easy dinner that feels like a takeout night but comes together right in your own kitchen. Tender slices of beef roast alongside colorful vegetables and ramen noodles that soak up a rich soy garlic sauce. Everything cooks on one pan which means less cleanup and more time sitting down with the people you love.
Print Recipe
Ingredients
- ½ cup soy sauce low sodium preferred
- ¼ cup brown sugar
- 1½ cups beef broth
- 2 cloves garlic minced
- ½ teaspoon ground ginger
- 2 tablespoons cornstarch
- 1 teaspoon sesame oil
- 1 pound flank steak or sirloin thinly sliced against the grain
- ½ teaspoon salt
- ½ teaspoon black pepper
- 1 red bell pepper thinly sliced
- 1 yellow bell pepper thinly sliced
- 2 cups broccoli florets
- 2 packages ramen noodles seasoning packets discarded
- 2 green onions sliced
- 1 teaspoon sesame seeds optional
Instructions
- Step 1: Preheat the oven - Preheat your oven to 425°F. Starting with a hot oven helps everything cook evenly and allows the sauce to thicken nicely.
- Step 2: Make the sauce - In a medium bowl whisk together the soy sauce, brown sugar, beef broth, minced garlic, ground ginger, cornstarch, and sesame oil until everything is smooth and well combined.
- Step 3: Add the sauce to the pan - Pour the sauce evenly into a 9x13 baking dish or a deep sheet pan with raised edges. This liquid will become the flavorful base that cooks the noodles.
- Step 4: Add the ramen noodles - Break each ramen block in half and place the noodles directly into the sauce. Let them sit for a moment so they begin absorbing the liquid.
- Step 5: Season the beef - Place the thinly sliced beef in a bowl and season it with salt and black pepper. Toss lightly so the seasoning coats the slices.
- Step 6: Add the vegetables - Scatter the sliced red bell pepper, yellow bell pepper, and broccoli florets evenly over the ramen noodles.
- Step 7: Layer the beef - Spread the seasoned beef slices across the vegetables in an even layer. The beef will cook gently as the noodles soften beneath it.
- Step 8: Cover and bake - Cover the pan tightly with foil and place it in the oven. Bake for about 20 minutes so the noodles can soften and absorb the sauce.
- Step 9: Stir the noodles - Carefully remove the foil and gently stir the noodles so they finish soaking up the flavorful sauce.
- Step 10: Finish baking - Return the pan to the oven uncovered and bake for another 5 minutes. The sauce will thicken slightly and the noodles will become perfectly tender.
- Step 11: Add toppings - Sprinkle sliced green onions and sesame seeds over the finished dish before serving.
Notes
Substitutions
- Different cuts of beef: Sirloin, ribeye, or shaved steak can easily replace flank steak.
- Broth swap: Chicken broth can replace beef broth if that is what you have on hand.
- Vegetable options: Snow peas, carrots, or snap peas work beautifully in place of broccoli.
- Natural sweetness: Honey can replace brown sugar for a slightly smoother sweetness.
- Lower sodium option: Coconut aminos can replace soy sauce if you prefer a lighter flavor.
Variations
- Spicy version: Add sriracha or chili garlic sauce to the sauce mixture for a kick of heat.
- Extra vegetables: Stir in shredded cabbage before baking for additional texture and nutrition.
- Ramen bowl style: Top each serving with a fried egg for a classic ramen feel.
- Citrus brightness: Finish with a splash of lime juice and a touch more sesame oil before serving.
Tips and Tricks
- Slice the beef thin: Cutting the meat thinly against the grain keeps it tender during baking.
- Let the noodles soak: If the noodles still seem firm after the first bake, stir them gently and allow them to sit in the hot sauce for a few minutes.
- Break ramen carefully: Larger pieces hold their texture better during baking.
- Use a deep pan: A sheet pan with raised edges or a casserole dish helps hold the sauce.
- Do not skip the foil: Covering the pan at first allows the noodles to soften evenly.
Serving Ideas
- Simple bowl dinner: Serve the ramen straight from the pan in big cozy bowls.
- Add a fried egg: A soft egg on top makes the dish feel like a ramen shop meal.
- Side salad: A crisp cucumber or Asian style salad balances the rich noodles.
- Extra toppings: Try chili flakes, extra green onions, or a drizzle of sesame oil.
Storage and Make Ahead Tips
- Refrigerate leftovers: Store in an airtight container in the refrigerator for up to 3 days.
- Reheat gently: Warm in the microwave or skillet with a small splash of broth to loosen the sauce.
- Meal prep option: Portion the ramen into containers for easy lunches during the week.
- Avoid freezing: The noodles can become too soft after freezing and reheating.
Private Notes
Servings: 6 servings
